Rolling Lumber Cart
I’ve had the good fortune of coming into a much larger garage. And with bigger space, comes bigger piles of scrap wood laying about. I didn’t have a good solution for lumber storage in my previous space either, and it’s about time to fix that. I considered mounting racks to the walls, but I’d like to use the walls for cabinets and benchtops. So, I decided to build a rolling lumber cart instead.
The Design
Some requirements I had for the cart:
- Capacity to hold a couple full 4x8 sheets of plywood
- Capacity to hold full 8 foot lengths of lumber
- Multiple sections for organizing by length, wood type, etc
- Ability to hold shorter sections, a few feet in length
I decided to start by designing for larger pieces of wood, and to keep the design flexible so I could later add cubbies and buckets for little tiny offcuts.
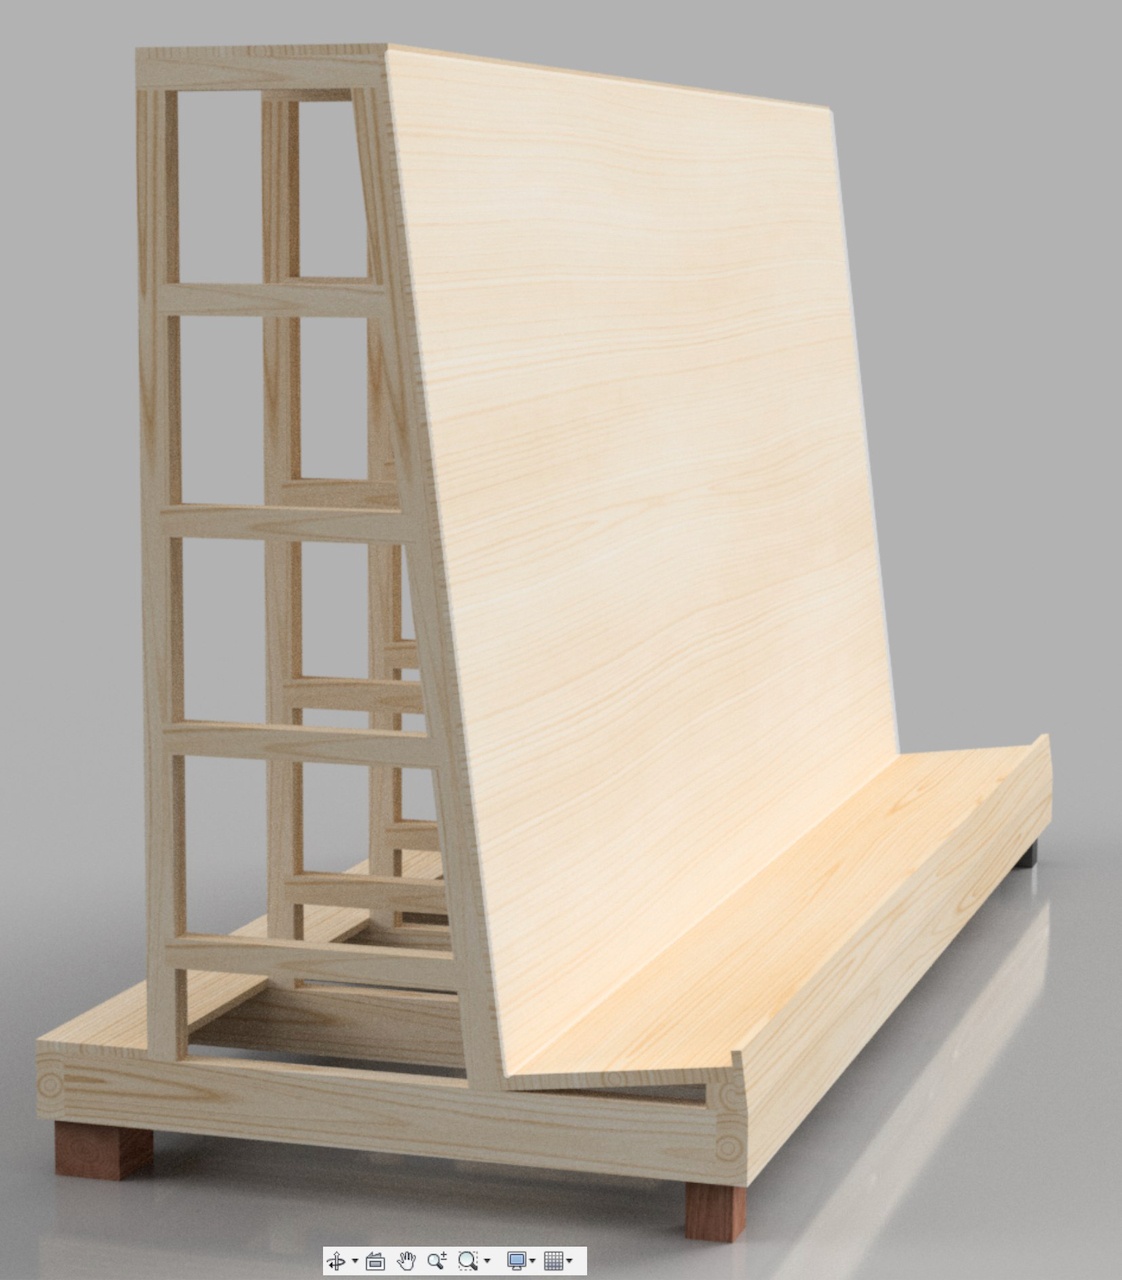
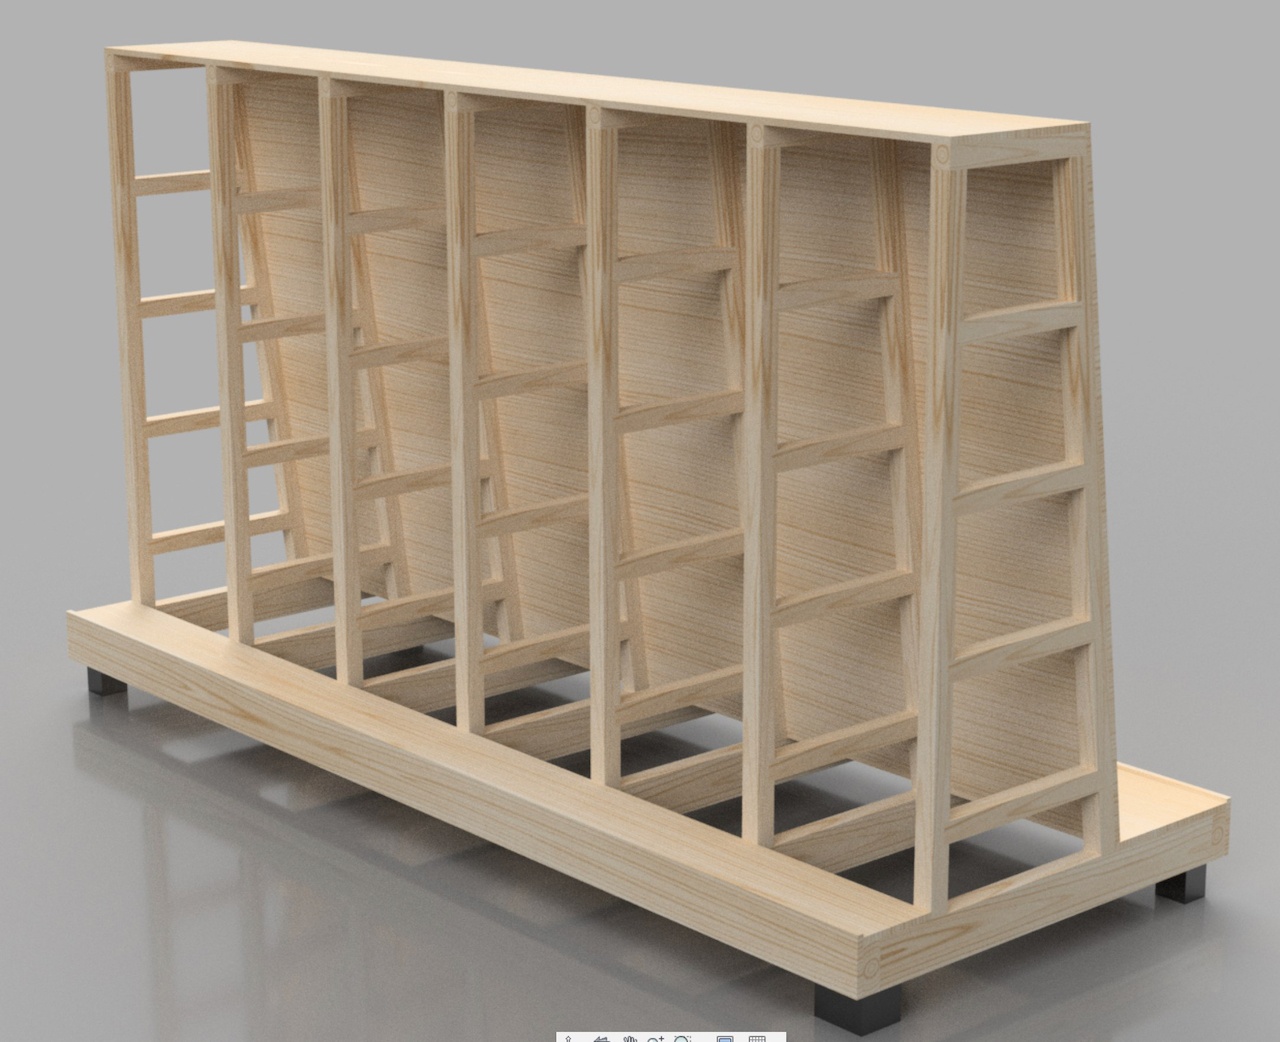
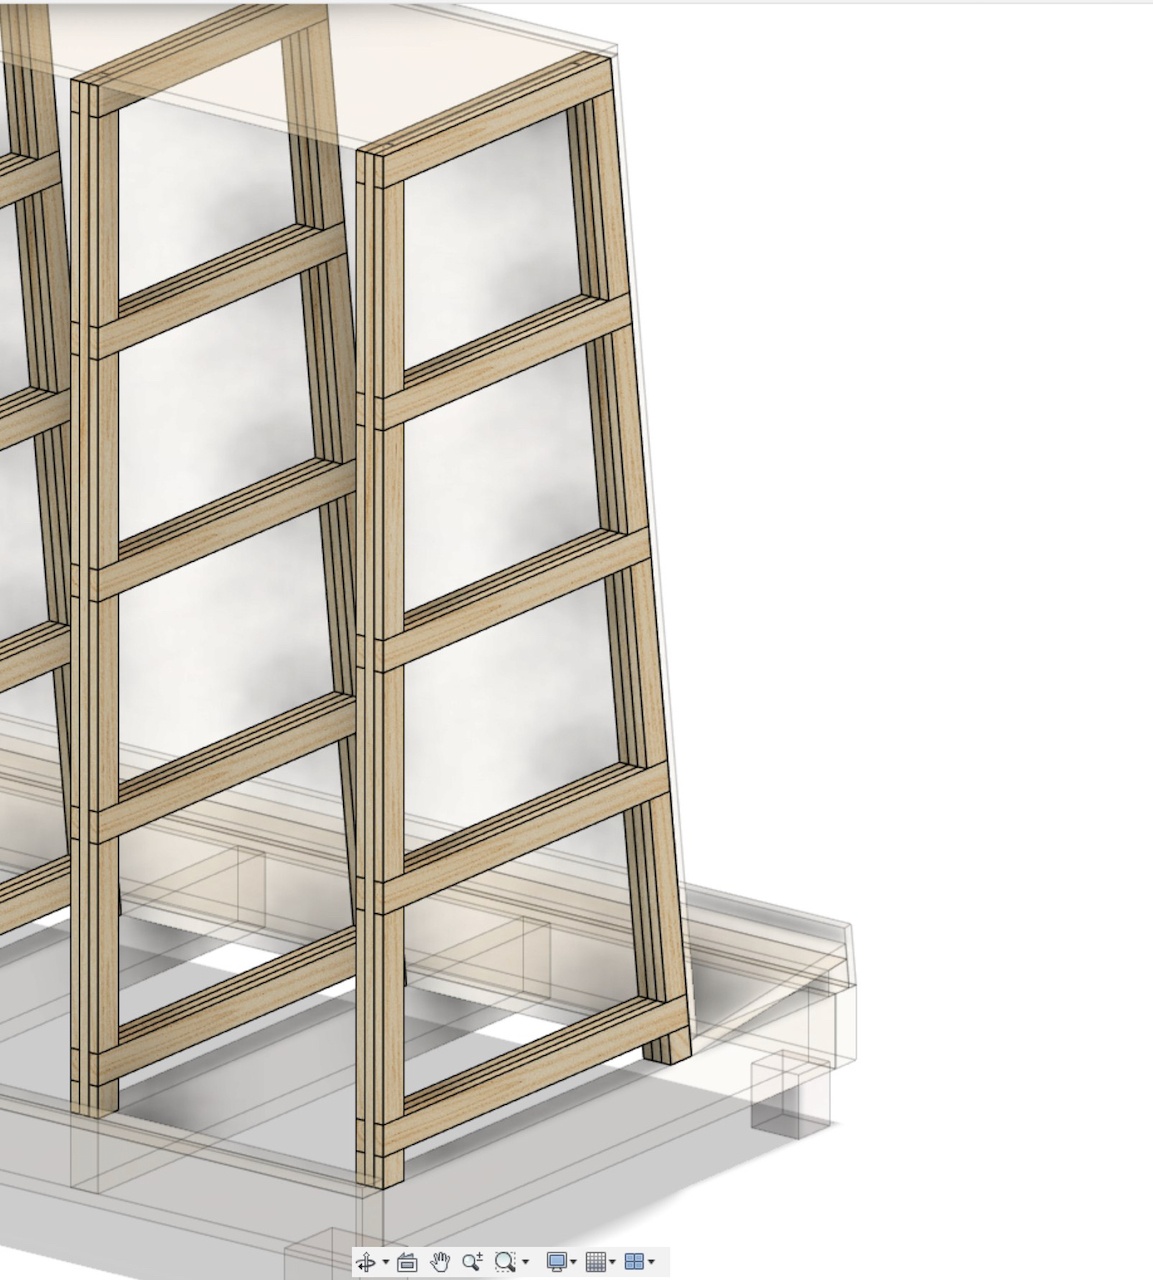
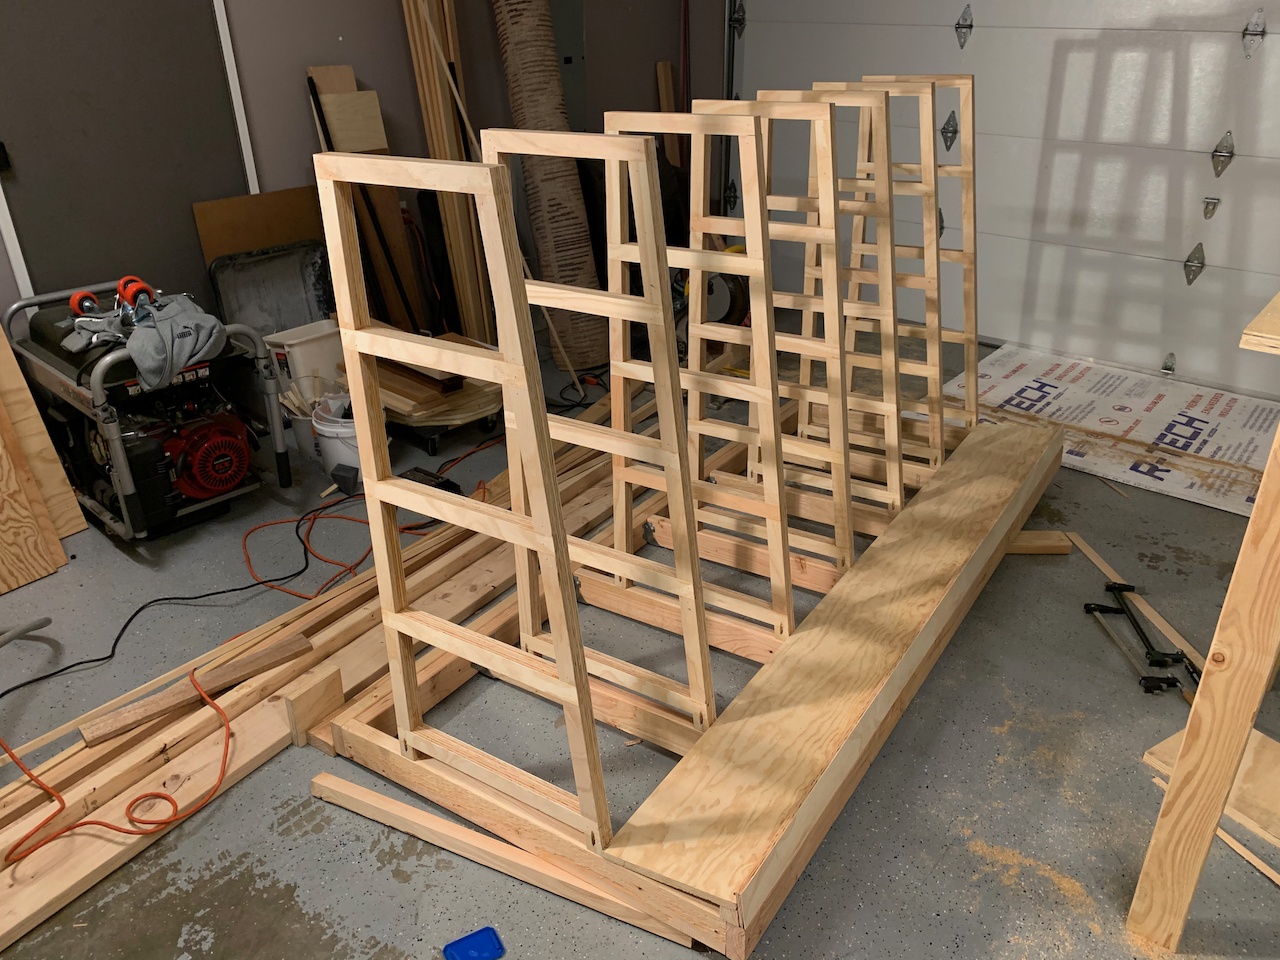
The design features a sheet-goods area angled at 7 degrees, which seems to be common enough for lumber racks like this. The struts supporting the frame are divided into four sections for easy organization. It’s on six locking casters (four of which are modeled as rough cubes) so it can be moved around the garage.
 |
 |
 |
 |
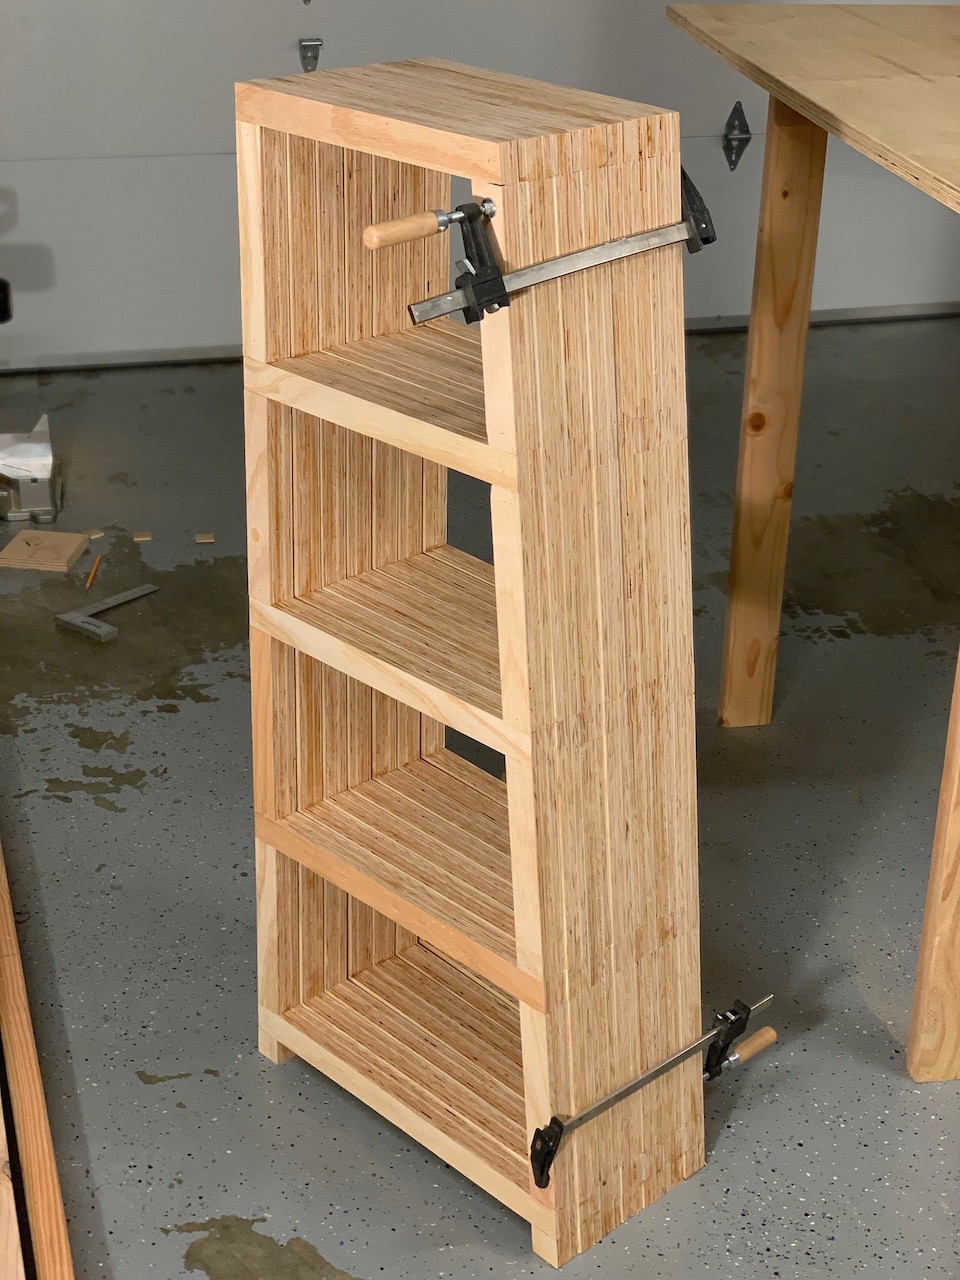
Building the Struts
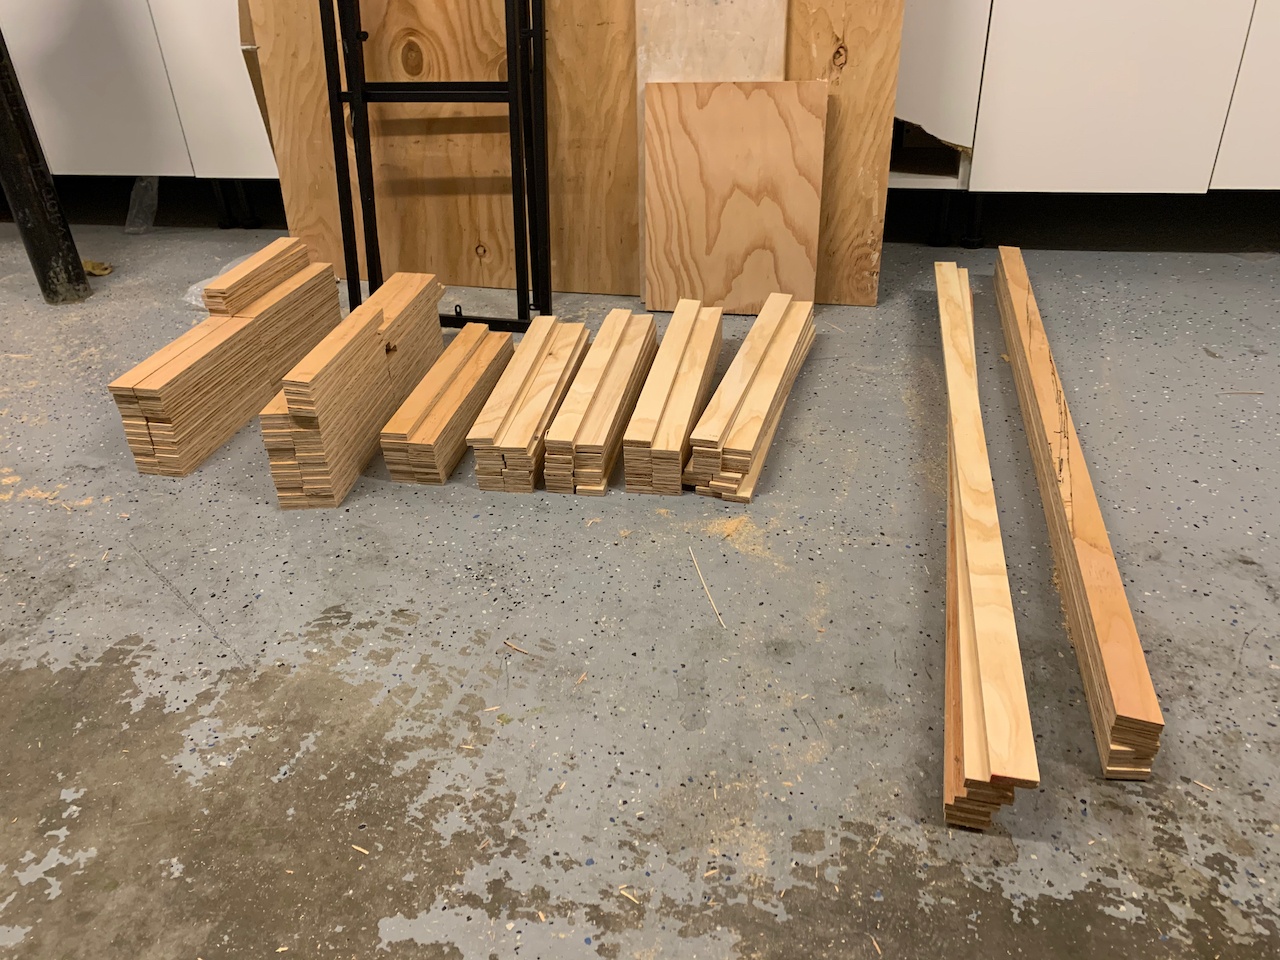
Lots of Cuts
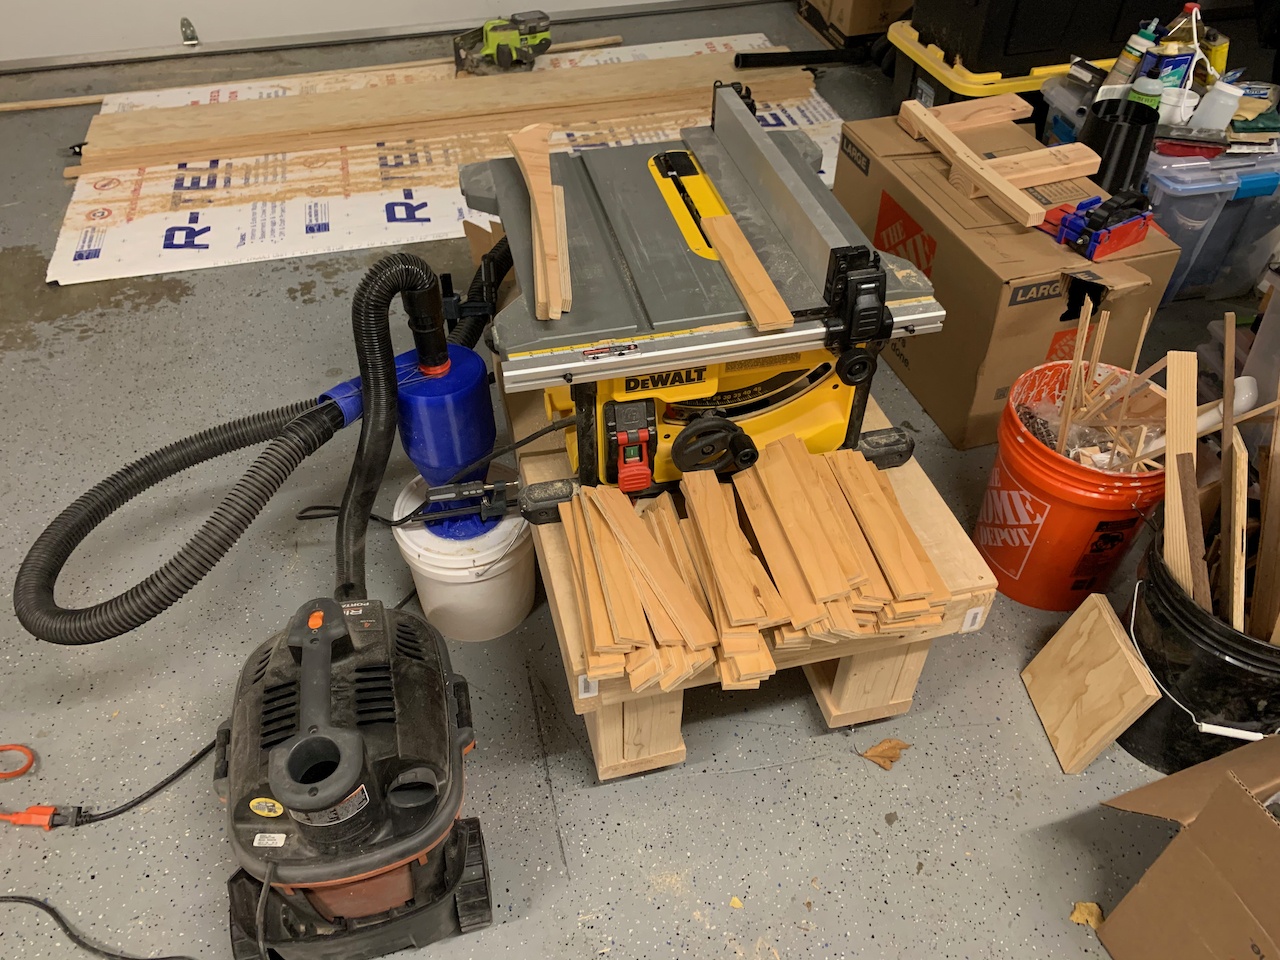
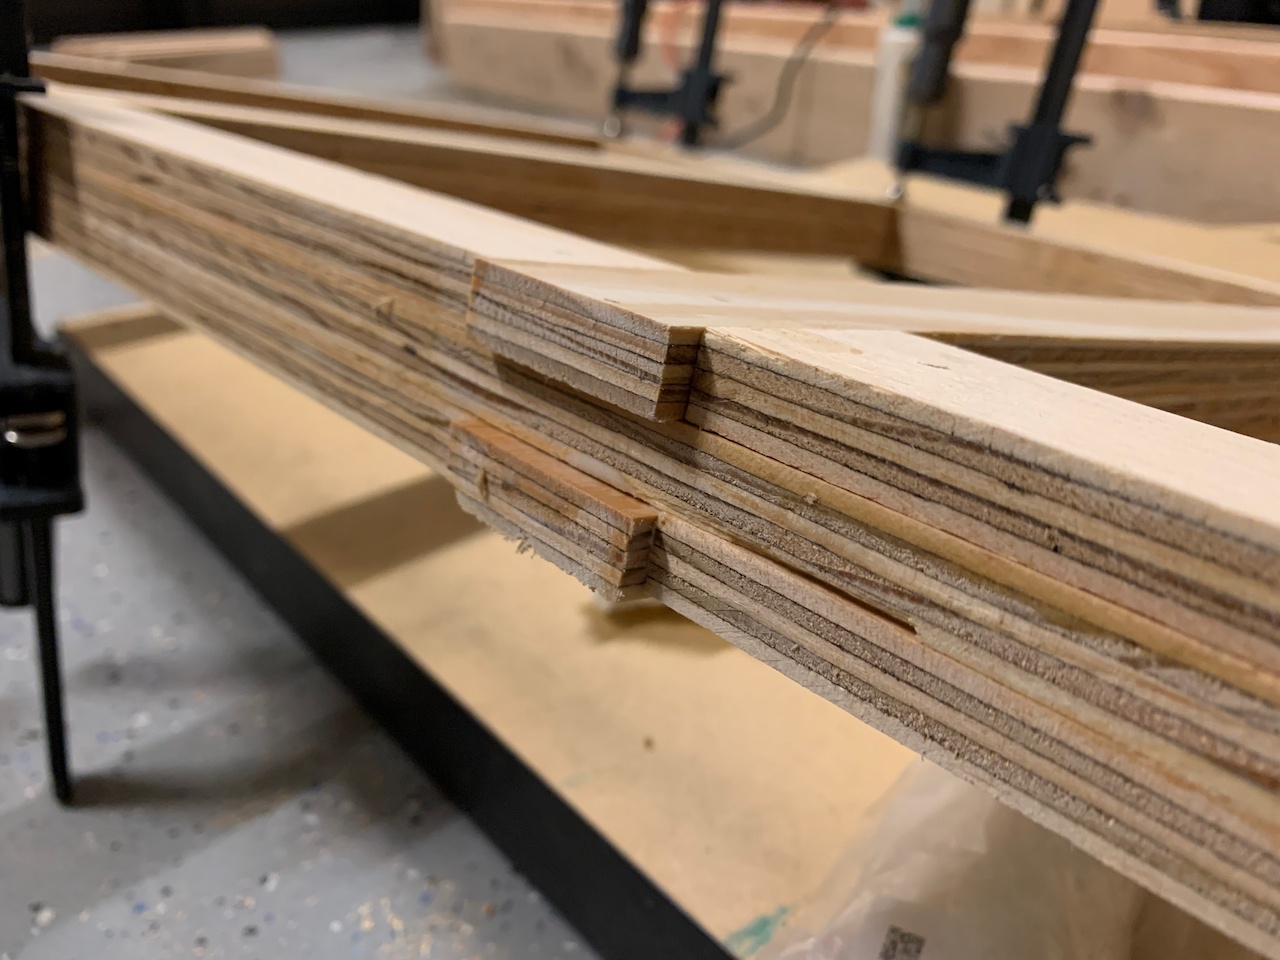
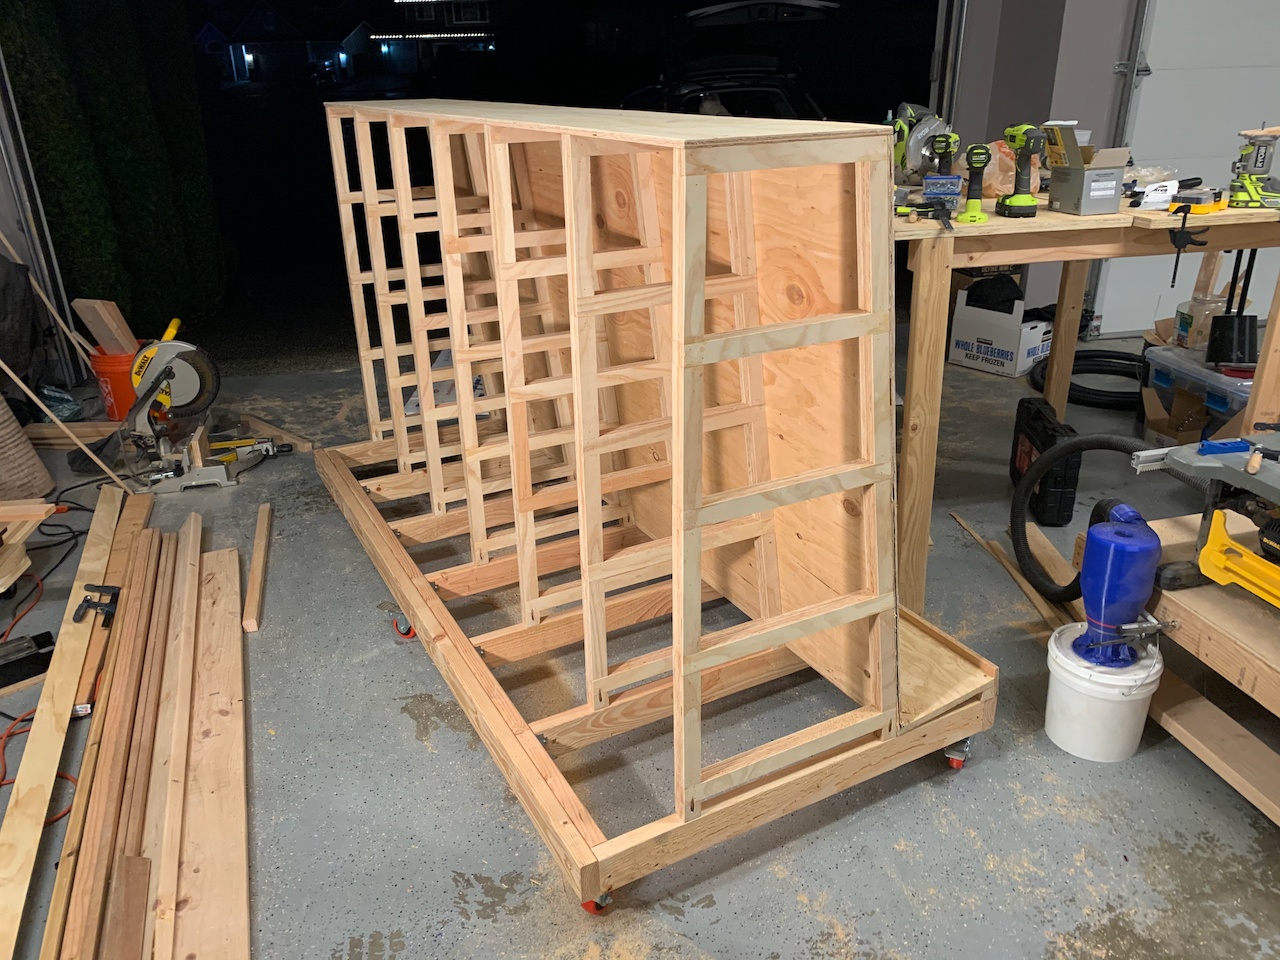
The struts were by far the most complicated part of the cart. Layers of plywood are laminated together to form mortise and tenon joints (or these might be closer to bridle joints). I started by cutting a half-inch sheet of plywood into 1.75 inch strips, which were then cut to length on the miter saw (in batches), and then cut to width on the table saw (to get straight edges and uniform width).
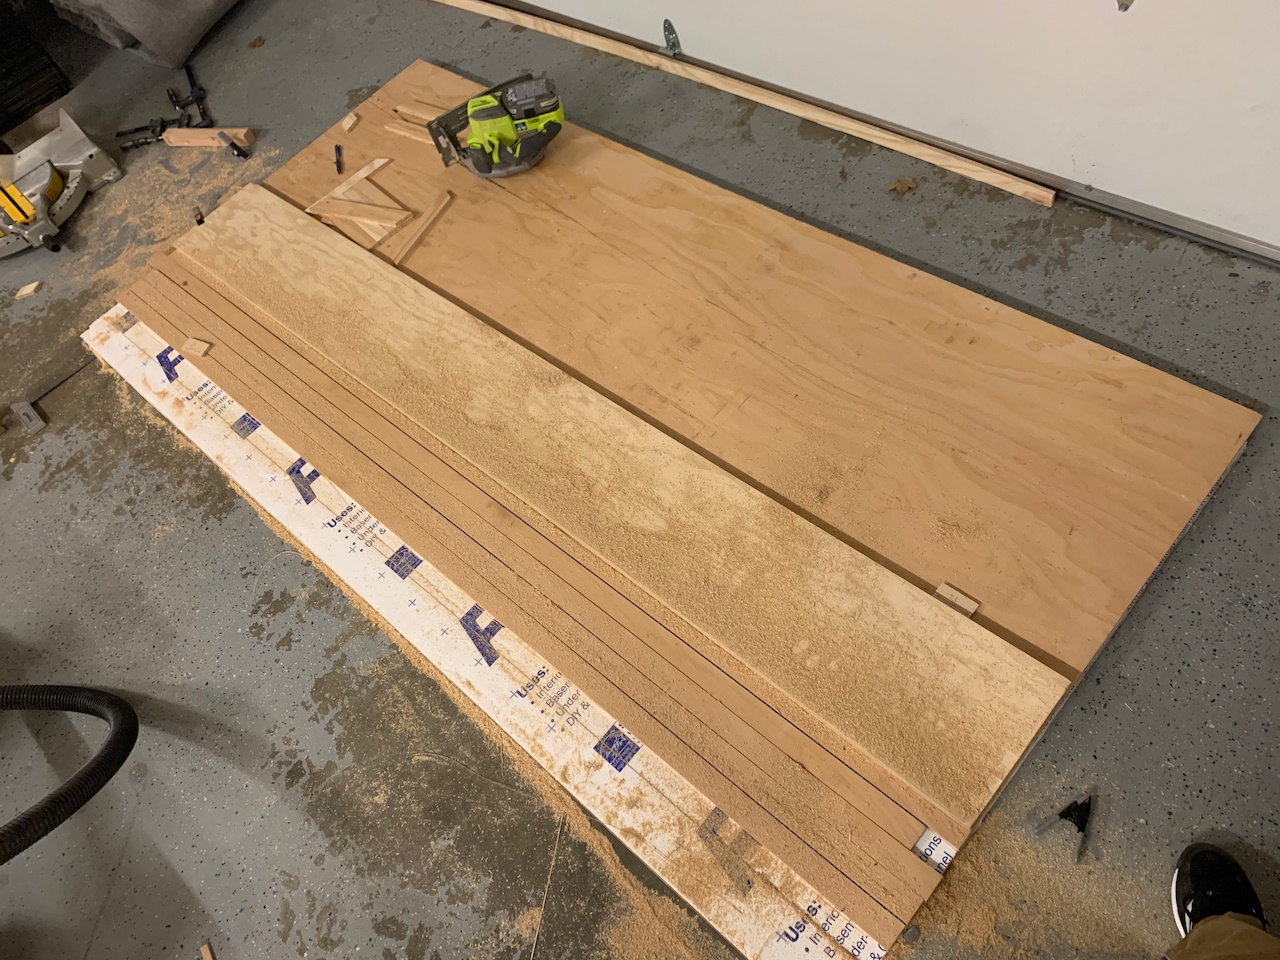
Each strut is made of 4*4 + 3*5 + 2 = 33 individual pieces, and there are 7 struts, so 231 individual pieces were cut and glued. I would opt for a simpler design next time. Cutting them in batches sped up the process.
I think they look pretty neat all stacked up according to function.
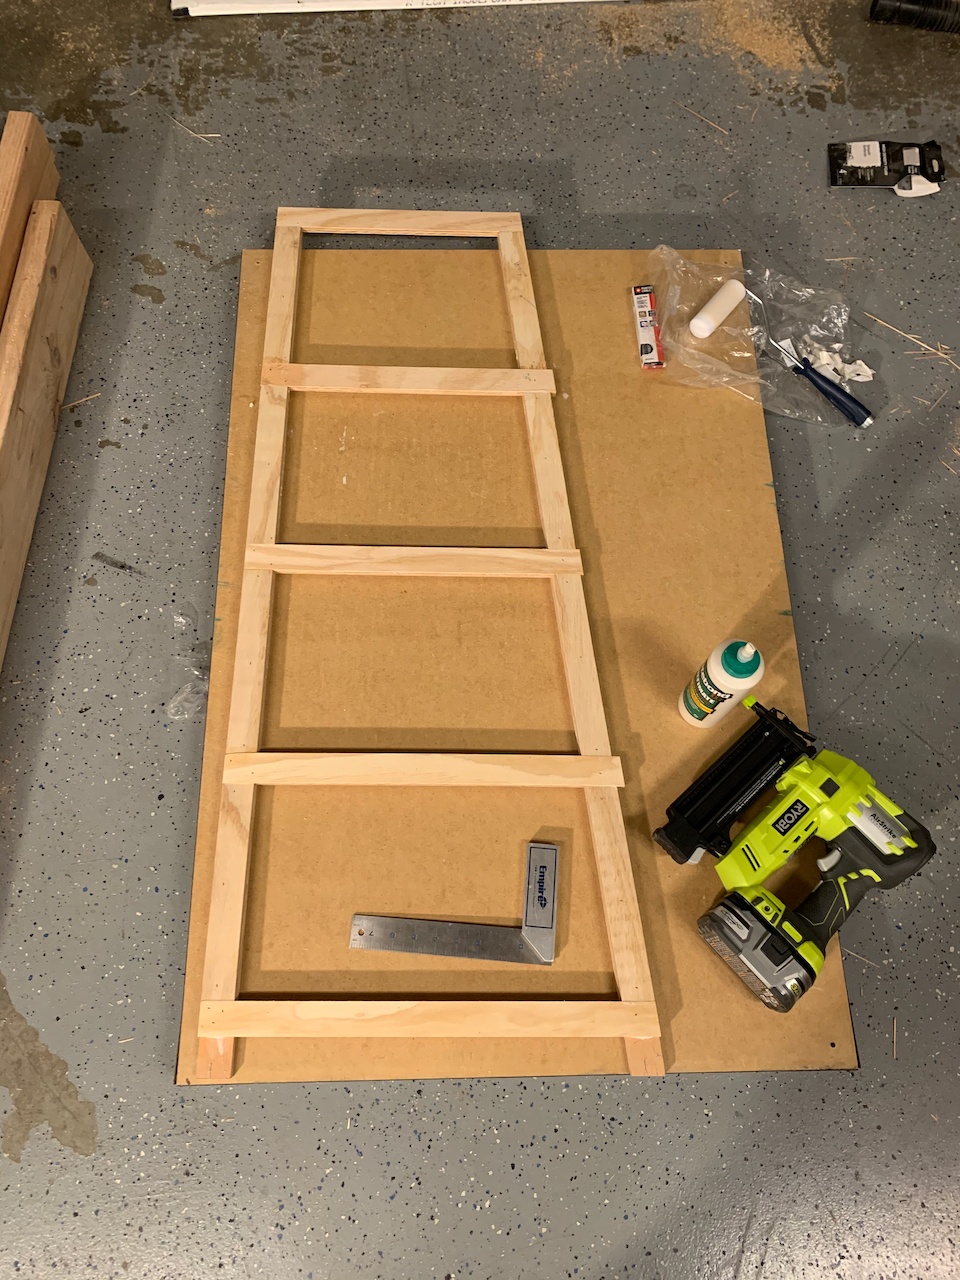
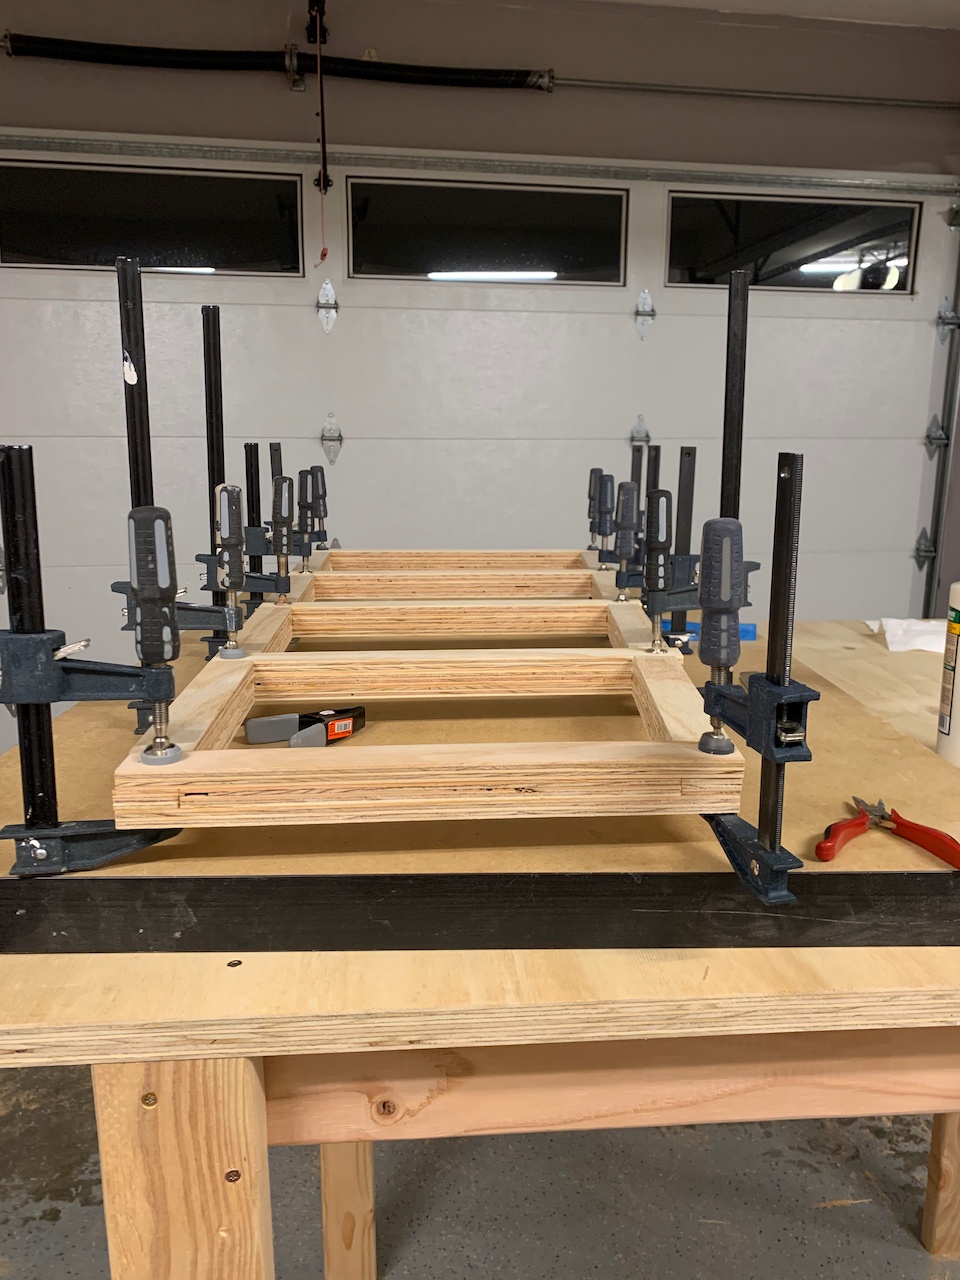
The Glue Up
It took a few tries to come up with a good order-of-operations for assembling the struts. I slathered the boards with glue (a foam roller helped spread it around), tacked the pieces down with 16 gauge brad nails, and clamped the joints again for good measure.
 |
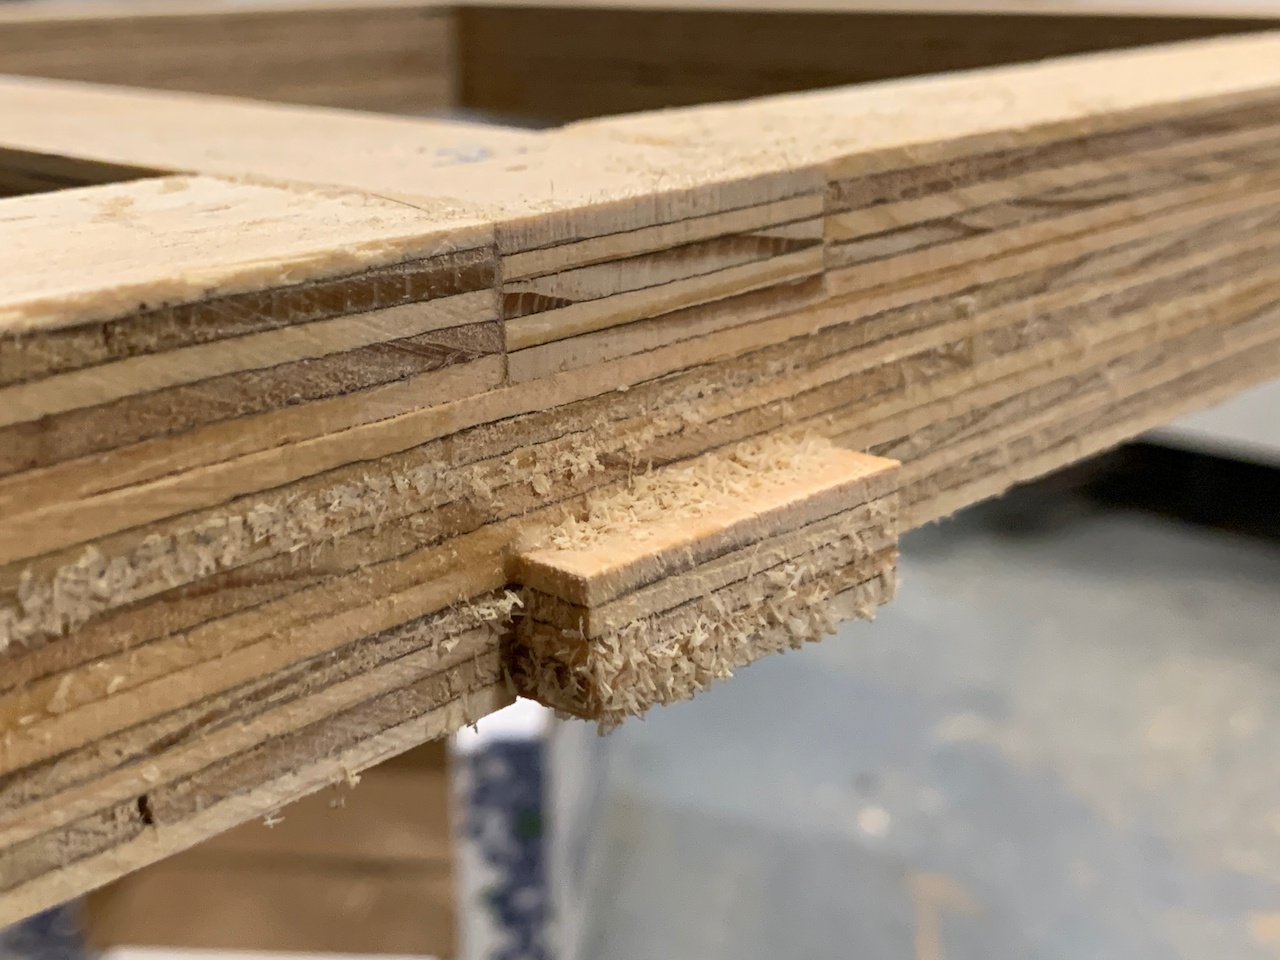 |
I left the middle horizontal struts a bit long so they could be trimmed with a flush-trim router bit. The long vertical cores were also left long, and were trimmed to length after the struts were assembled.
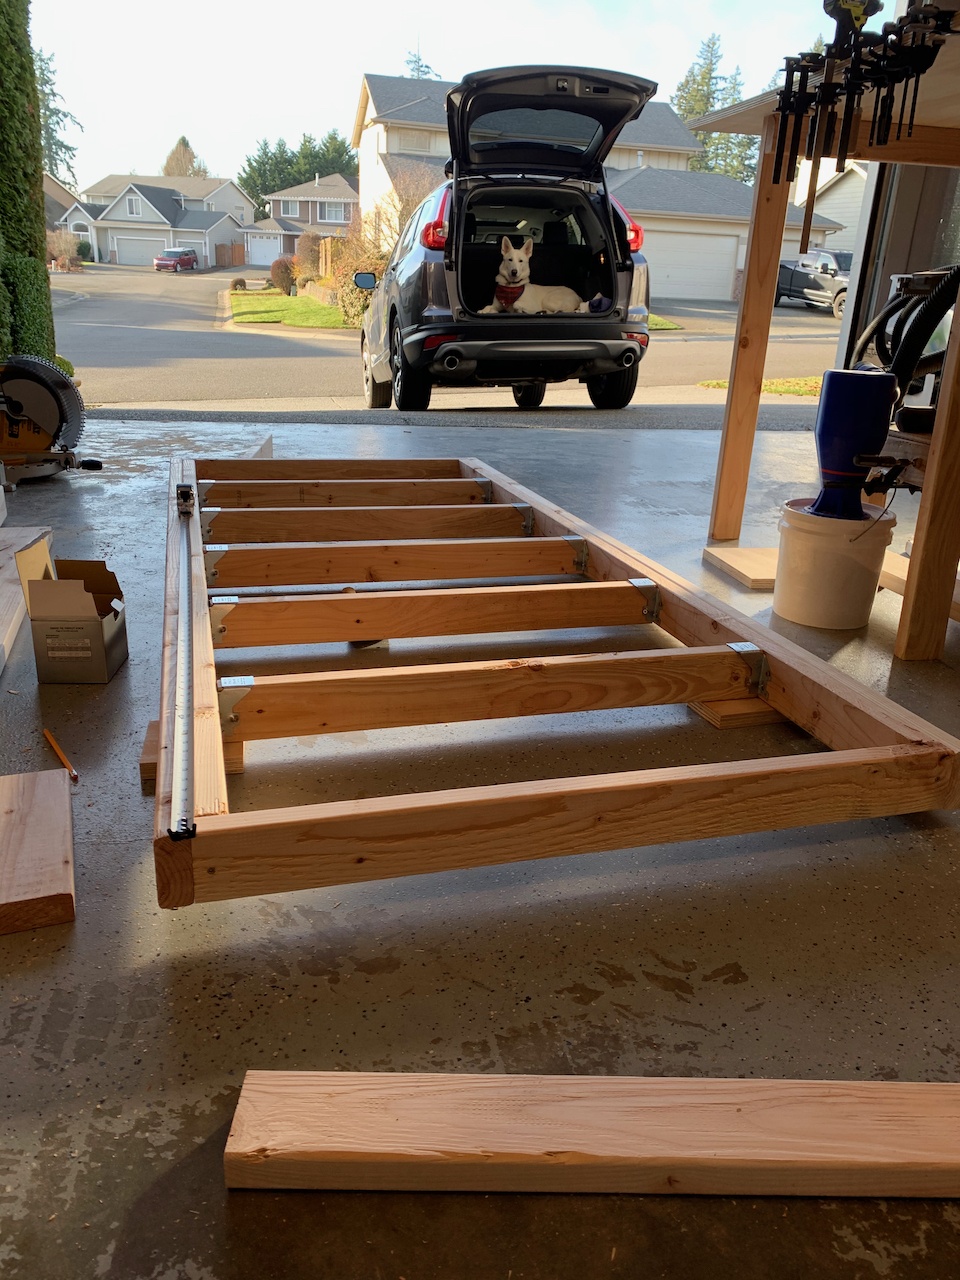
Building the Frame
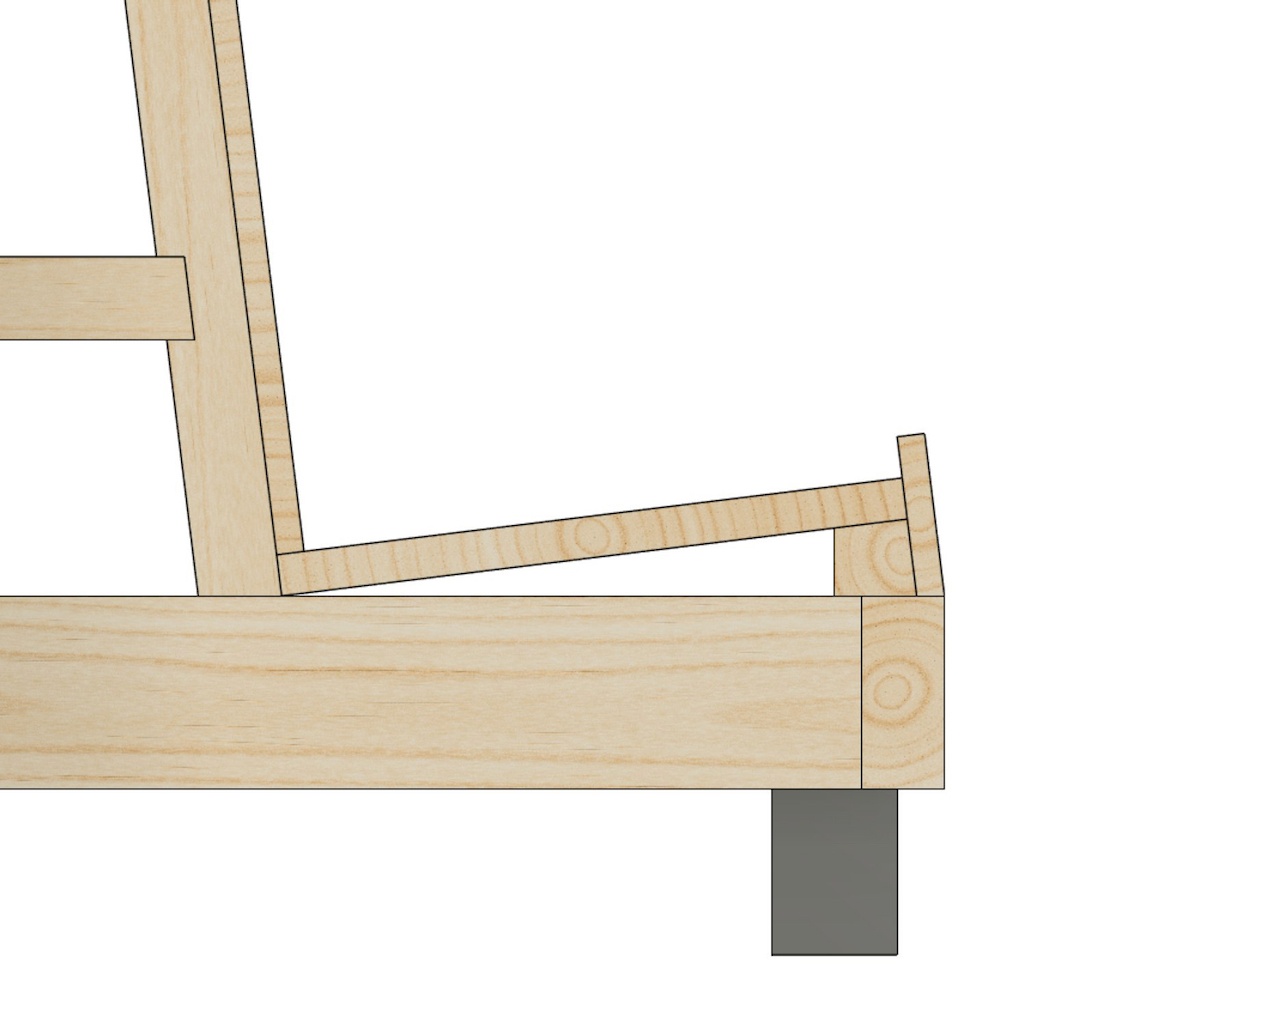
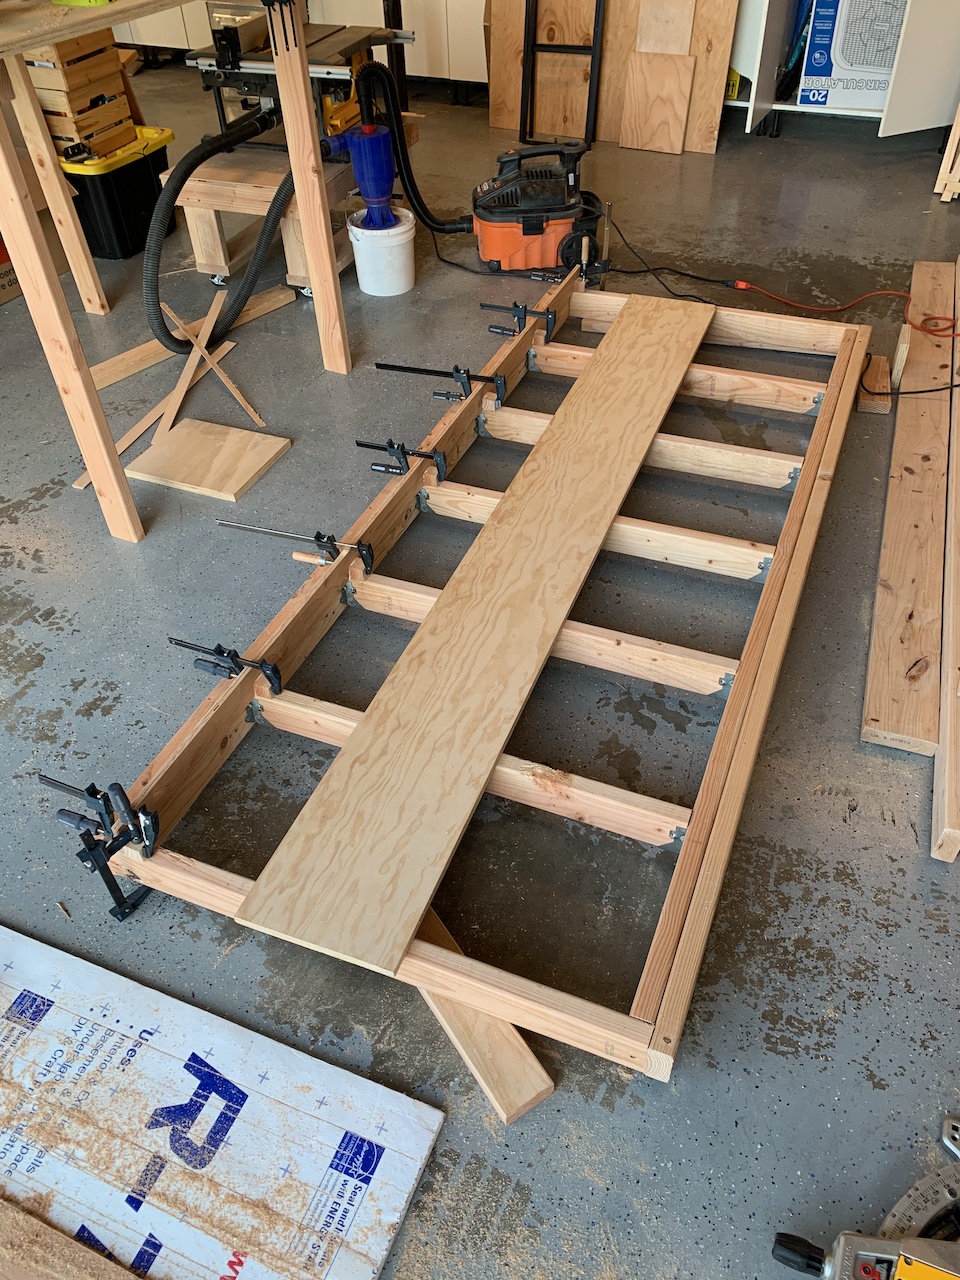
The frame is a simple shape — a rectangle with joists to provide support and rigidity. The long edges are two 2x4 boards laminated with glue and construction screws.

The joists are held with standard joist-hangers. They’re installed upside-down, so it’s easier to keep the hanger flush with the joist, and to keep the top-side of the joist flush with the frame. Once the screws are in, it’s easy to flip the whole (now quite heavy) frame right-side up.
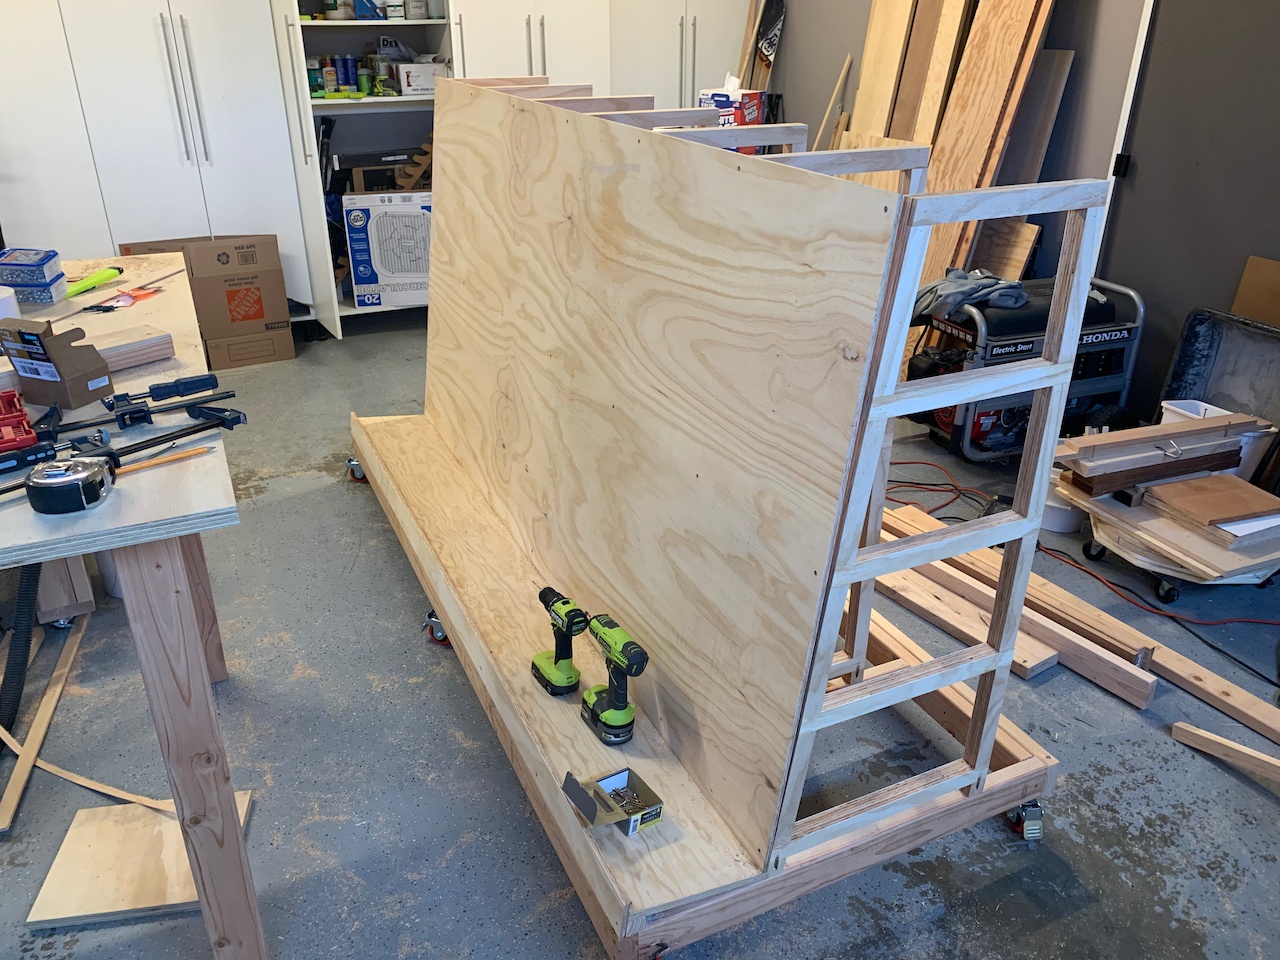
Plywood Stand Base
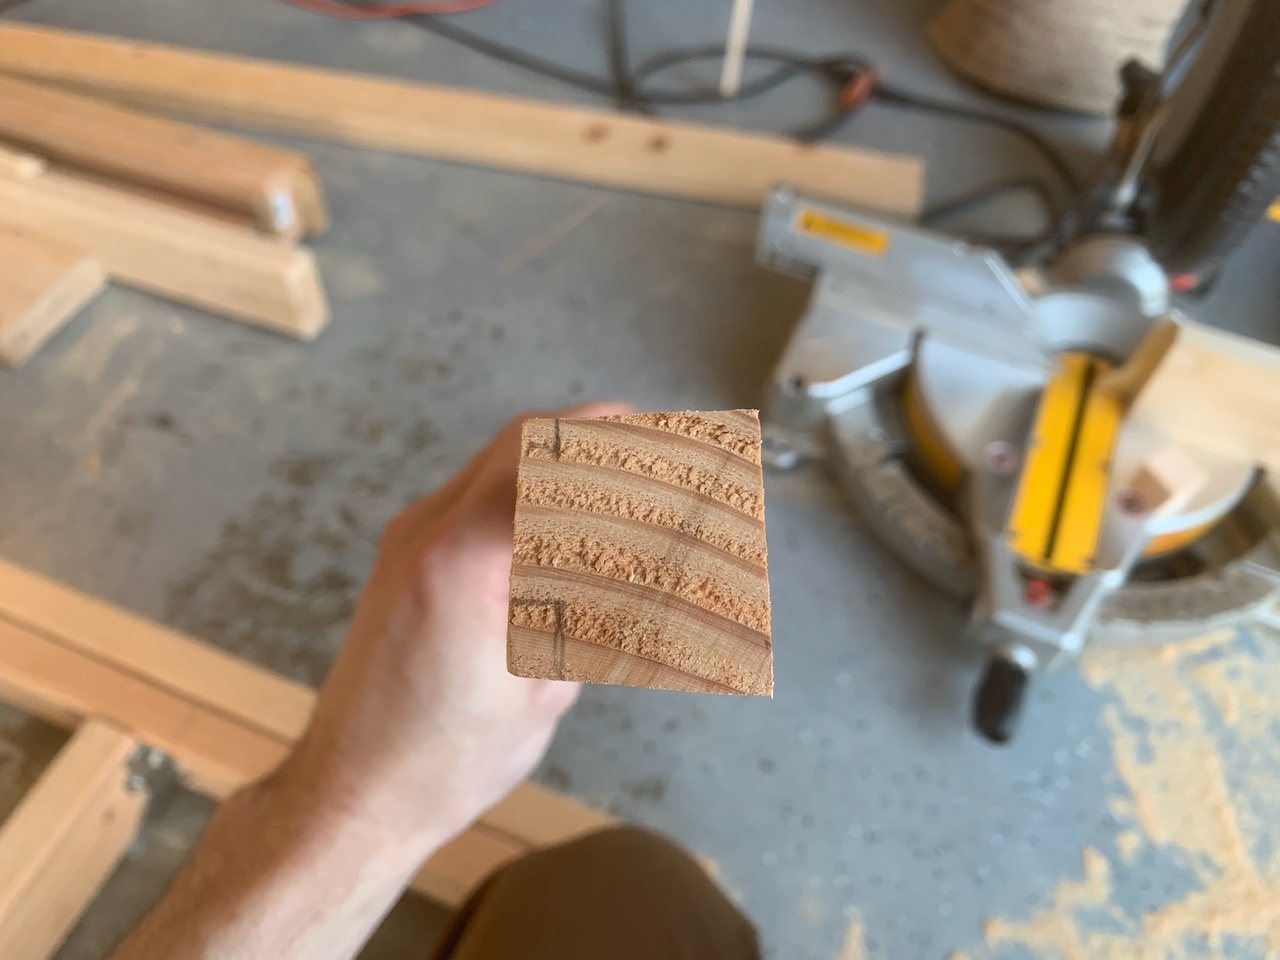
The plywood stand part of the cart is angled at 7 degrees - both the back that the sheets will lay on, and the base that supports them. This required cutting an awkwardly-shaped quadrilateral out of a 2x4 on the table saw, in one big strip. It took a few cuts to get it to the right height.
Once I had it to the right shape, I could chop it up into bunch of 1.5 inch pieces with the miter saw, and mount it to the base support lip spaced so they line up with the joists.
My local lumber yard gave me a bunch of plywood offcuts that were too small for them to sell. One such was 11 inches x 8 feet x 3/4 inch, which was the perfect dimension for the base plate of the support. I affixed it with screws and glue.
Final Assembly
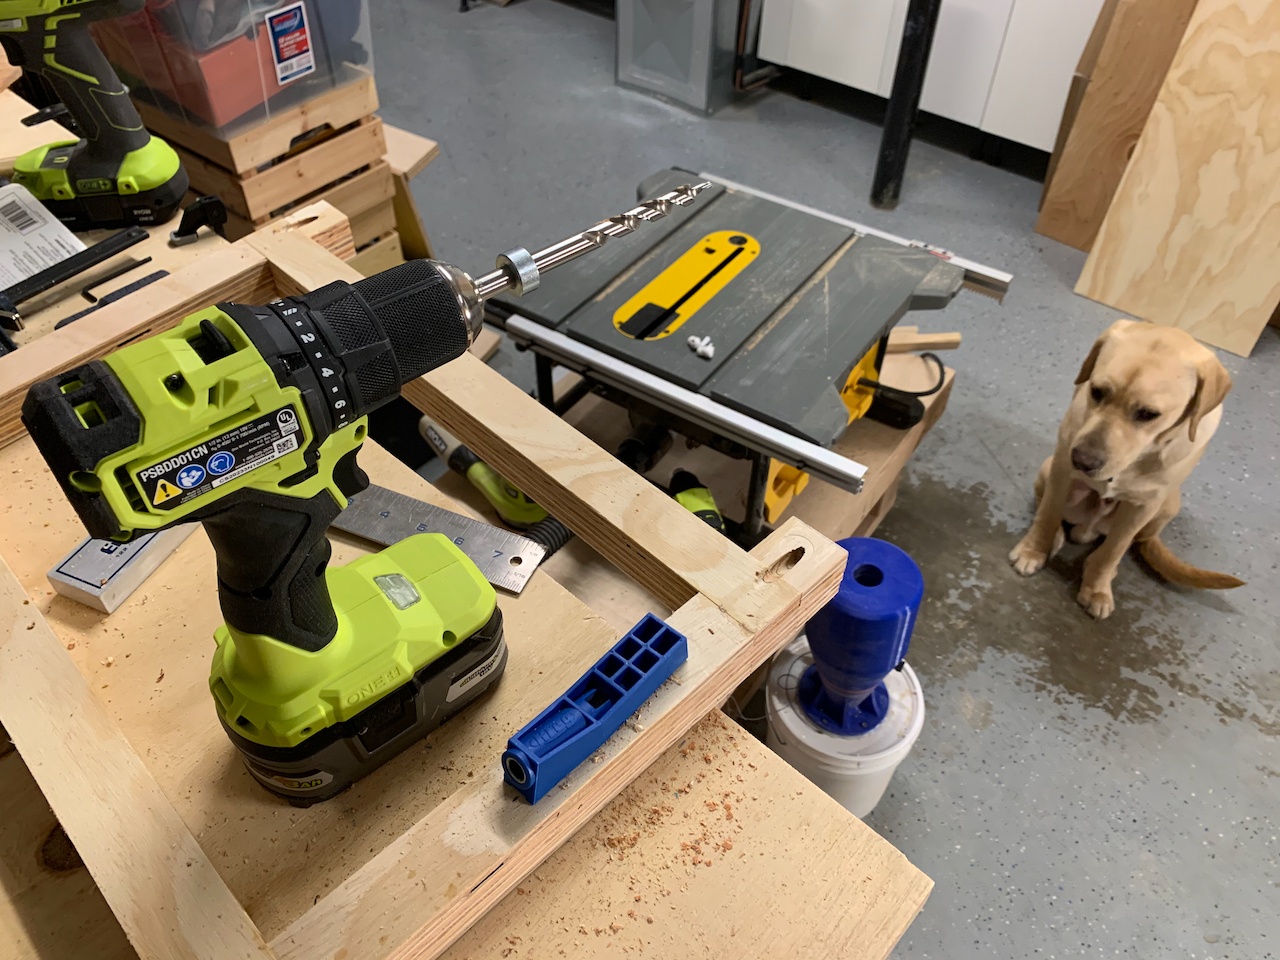
I used pocket hole screws to affix the struts to the joists (four total per). Kreg makes this great jig at a good price, I got it from the local Rocker store for $20.
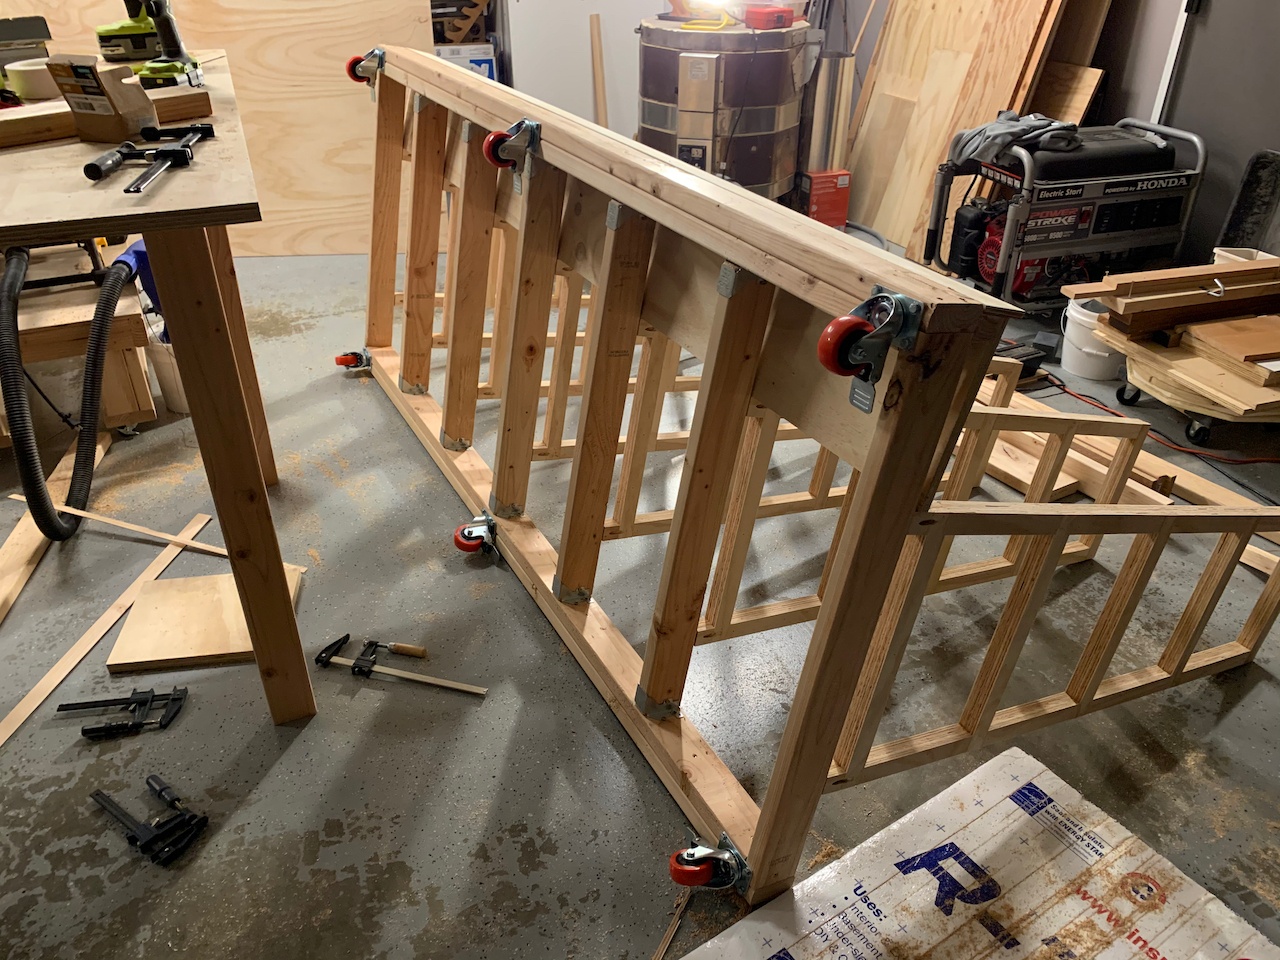
I flipped the cart on its back and installed the casters before the assembly got too heavy to tip over. They’re Home Depot dual locking casters, meaning both the rotation of the wheel will lock, as well as the direction the caster points. They’re each rated for 175 pounds, so in theory an evenly-loaded cart can hold a bit over half a ton.
The main sheet is a 1/2 inch thick 4x8 sheet of plywood. Screw holes were piloted and countersunk.
Another free offcut, 15 inches wide by 8 feet long, made up the top shelf of the cart. It pulled the top edge of the struts straight and provided rigidity to the top-back corners.
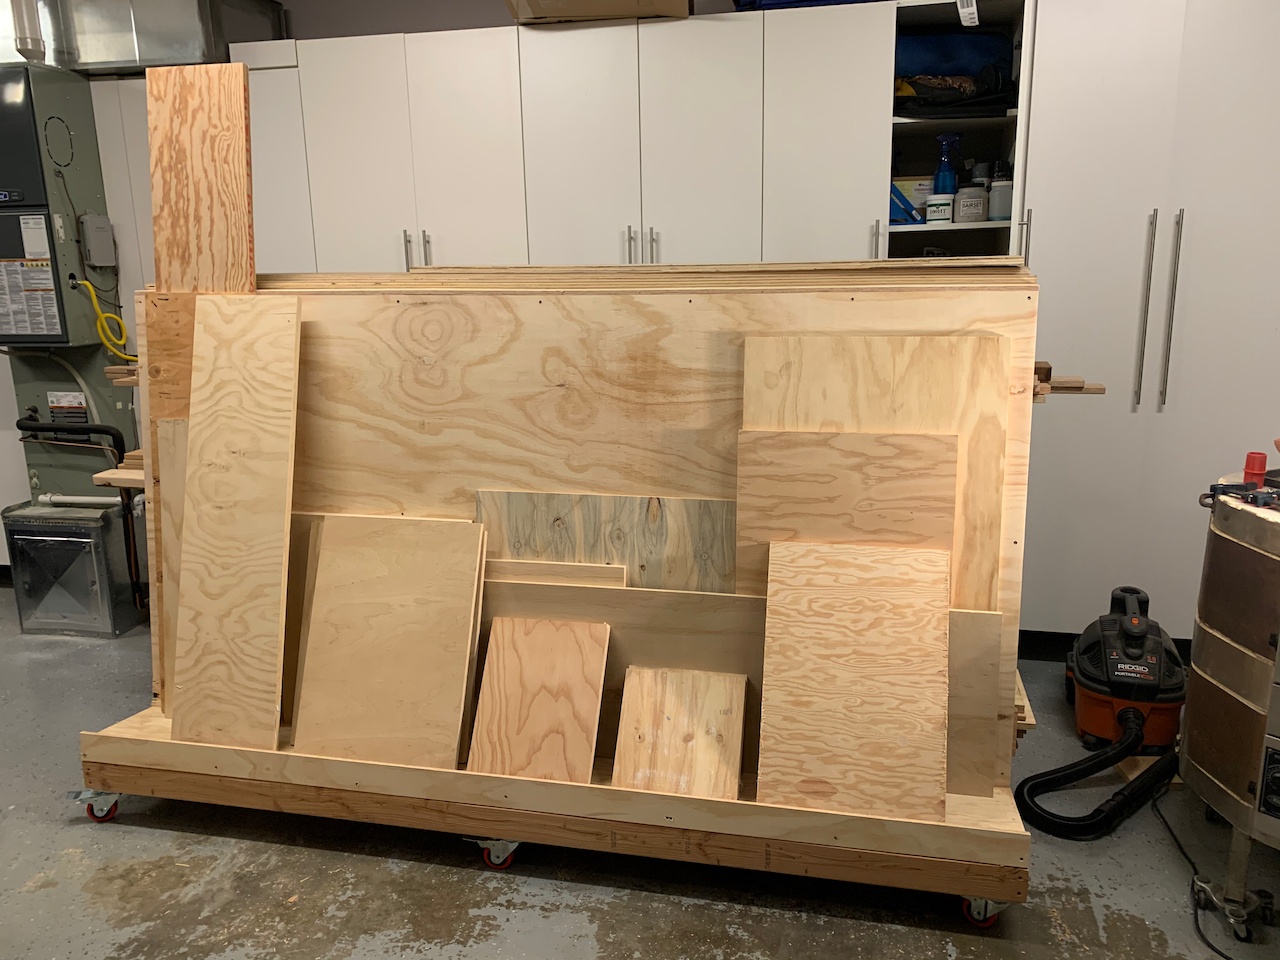
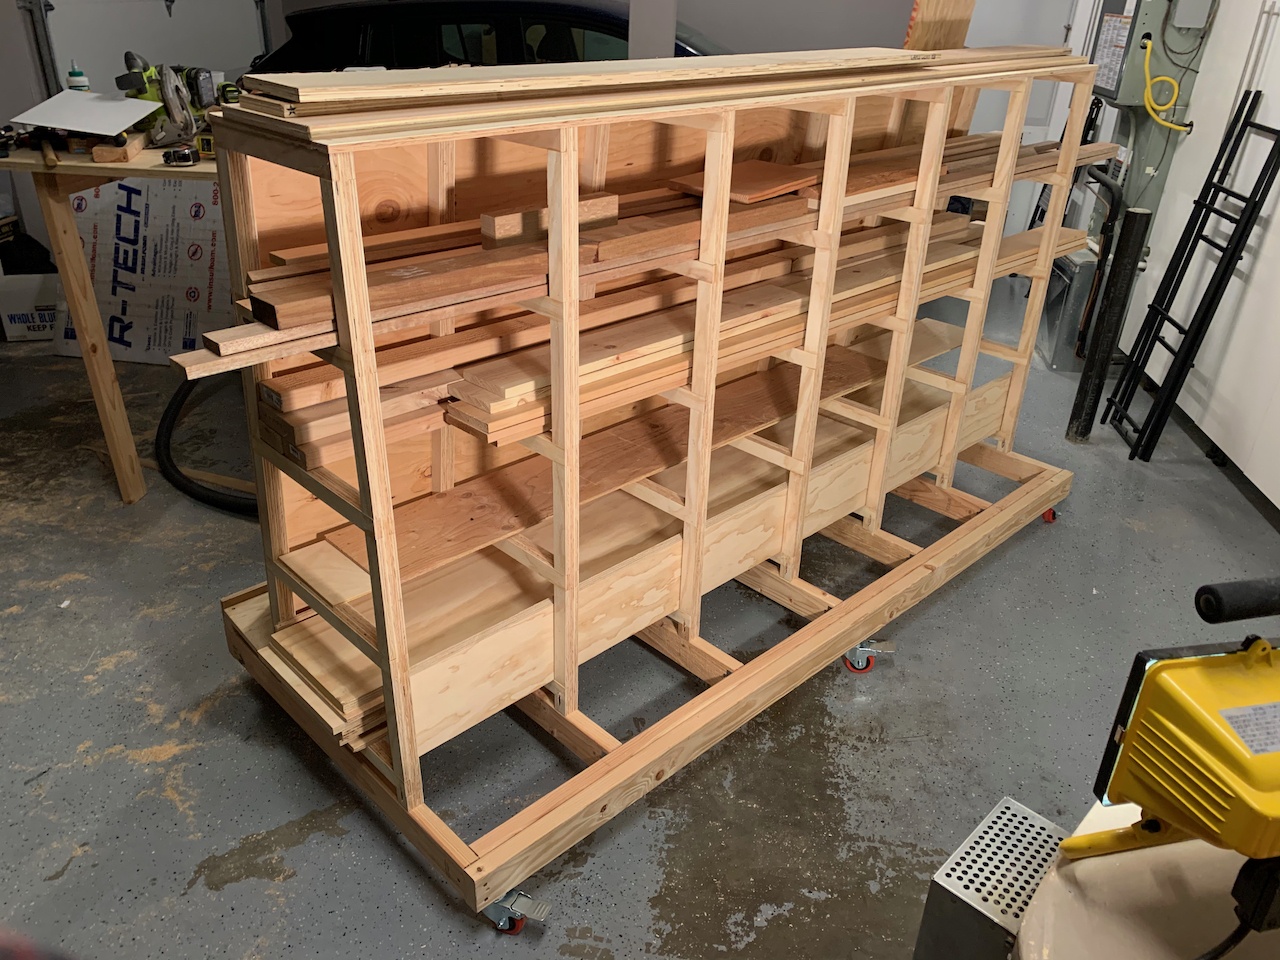
And that’s a complete cart. Here’s some glamour shots all loaded up. My garage has a lot less wood strewn about the floor now! I keep it in front of the garage door for now, because that wall space is otherwise unused. Maybe in the future I’ll add some additional storage options to the back, for much smaller offcuts.