Vinyl Record Stand - Part 1
Research & Design
I want a record stand. Or, well, my roommates do, proud new owners of vinyl that they are. Let’s go steal designs unabashedly find some inspiration.
After some Google-imaging, I’ve found this bad boy, which links to this broken URI—some sleuthing leads to a working link. At $420.00 CAD, I feel justified in building instead of buying.
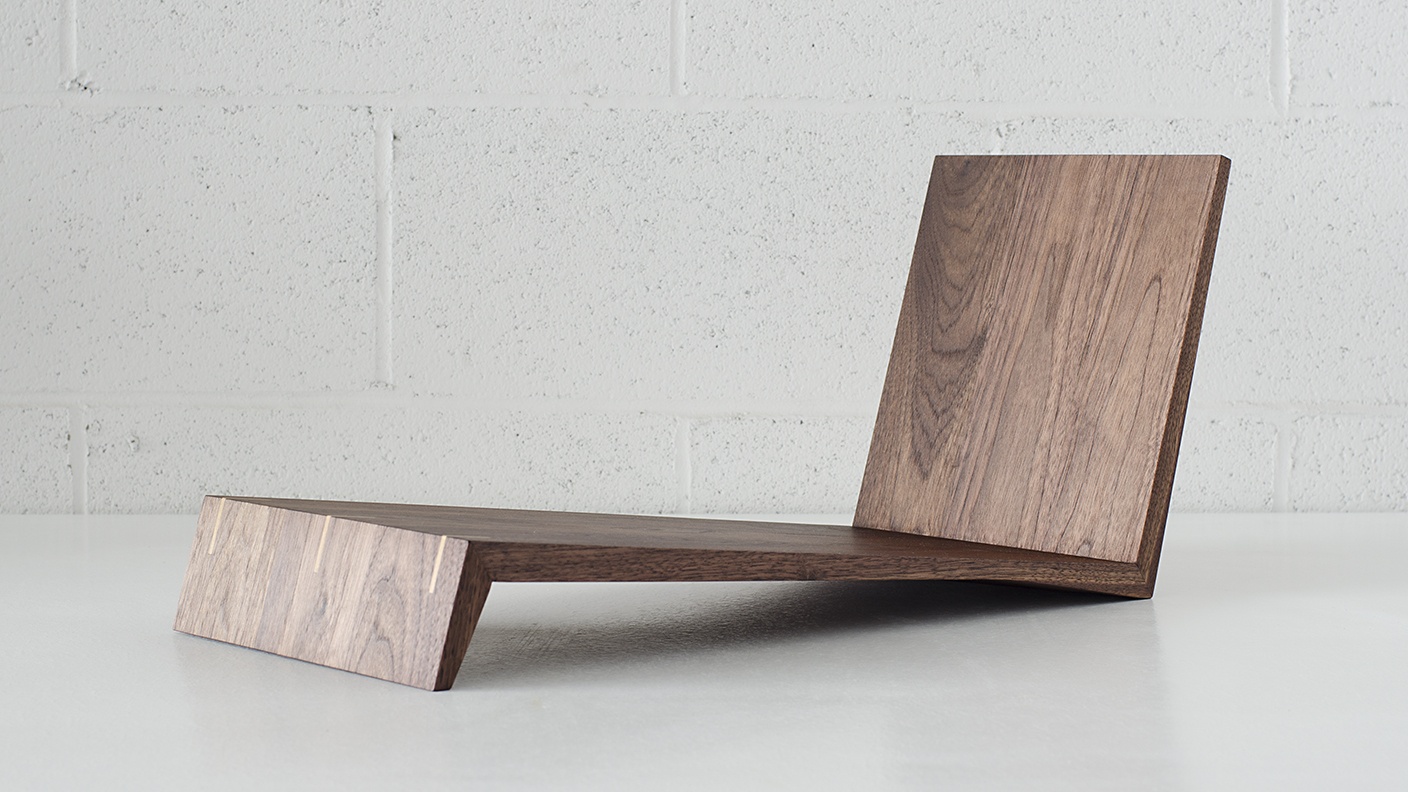
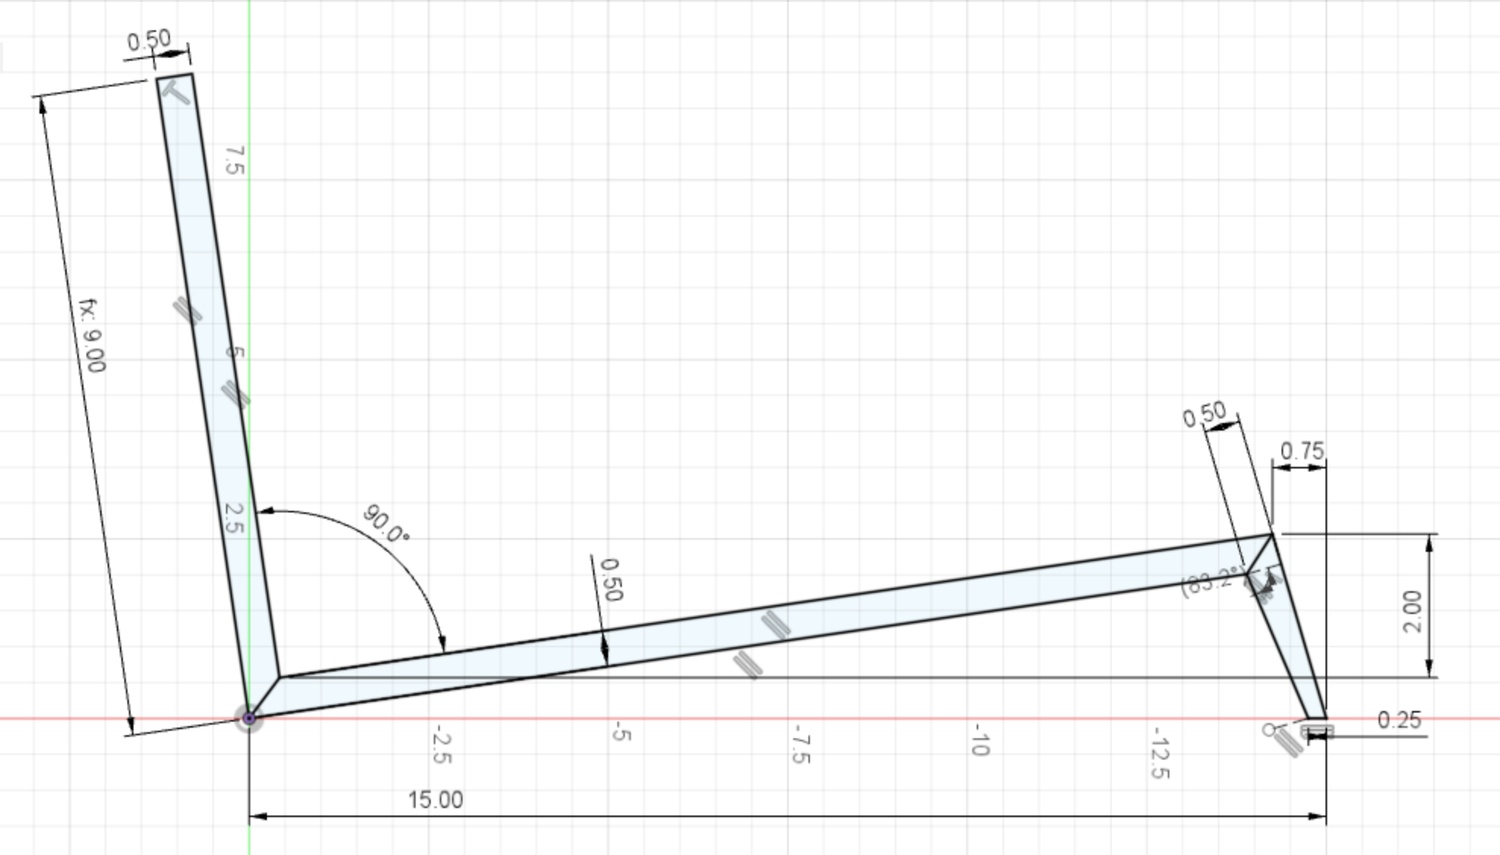
Alright, time to fire up Fusion 360. Knowing that an LP vinyl record in its case is ~12 inches square, we can give the back of it a height of 9 inches, and eyeball the rest until it looks decent.
It will be ~6 inches wide, for a sort of slender look. I’m not sure how well records will balance on it, but half their width seems sufficient.
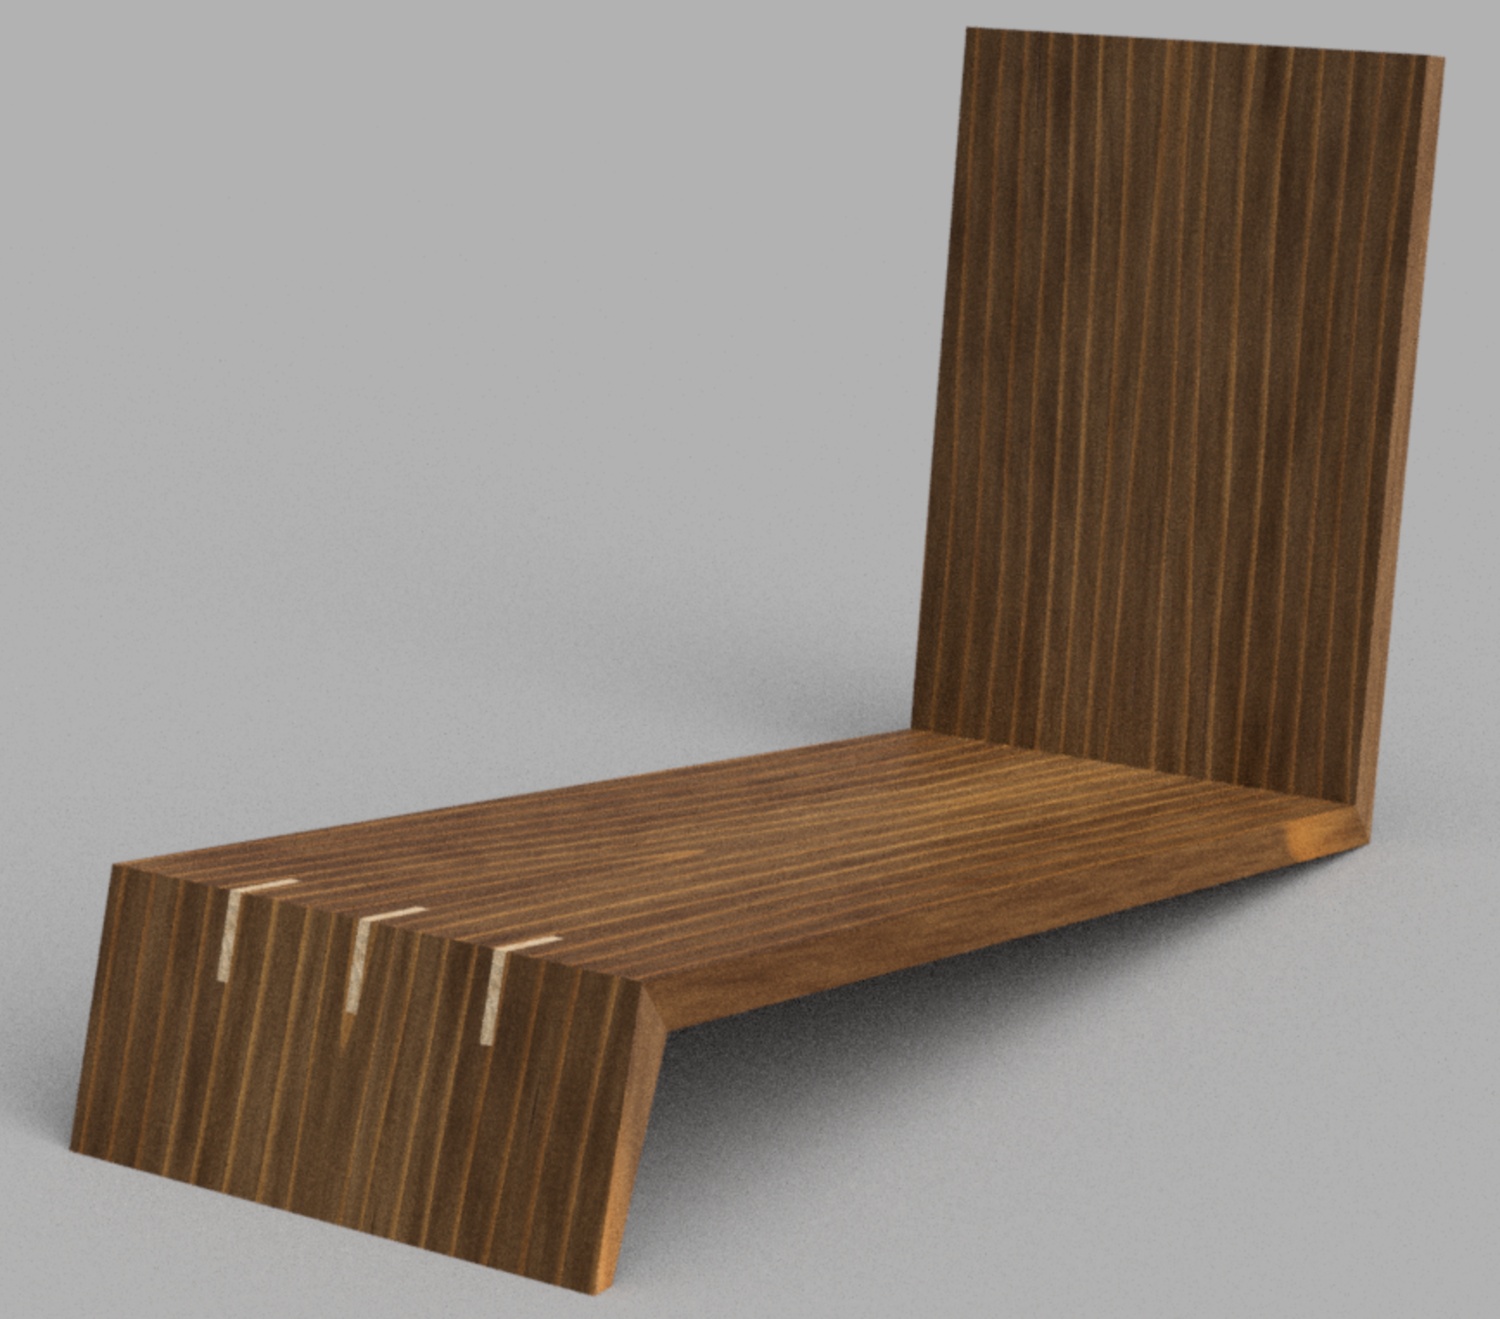
I’ll throw some splines on the miter joints, mostly to practice that sort of operation on the table saw, but I also just quite like the look. A quick render validates I’m not on the totally wrong track yet. I’m not sure if I’ll keep the splines that wide or go for something a bit more subtle - we’ll cross that bridge later.
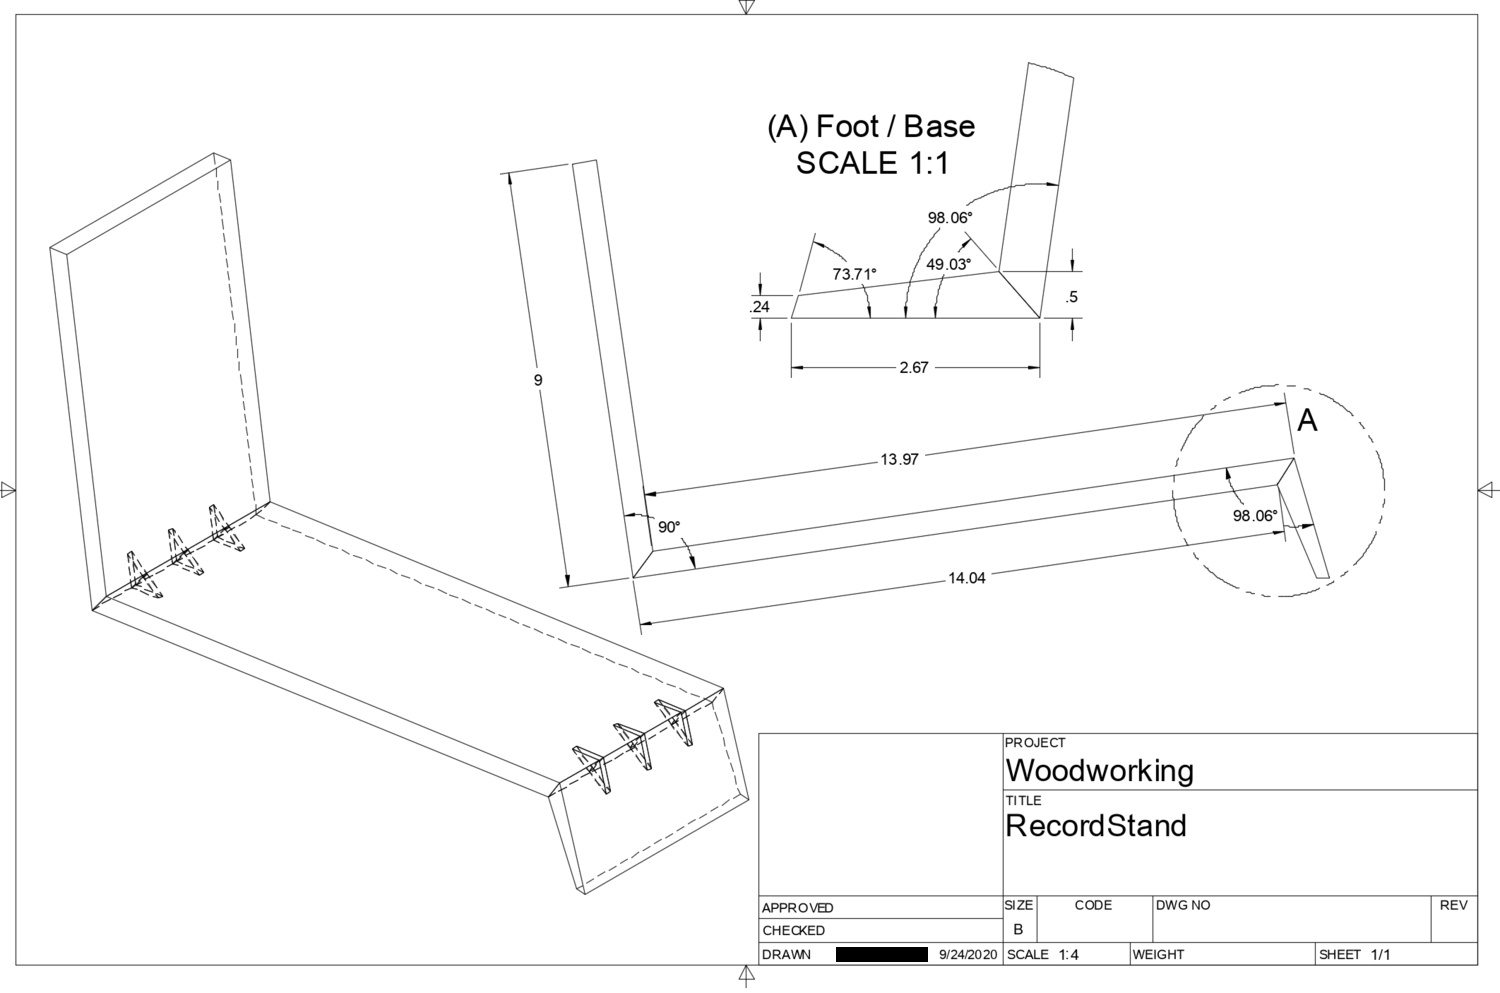
I’ve never used the Drawing tools within Fusion 360 before, and now seems like the perfect time to go try them. That way, I’ll have a handy-dandy blueprint with all the useful dimensions and angles for easy reference.
Sawdust Time
I’ve got a few 8’ lengths of what I think is Mahogany (at least, that’s what Dunn Lumber claims it is) - dimensionally it’s 2.5” by 0.75”. I could have made life a bit easier on myself, and made the record stand 0.75” wide rather than the prescribed 0.5”, but I like the more slender look, and I’ve wanted to learn how to resaw lumber on my job-site table saw.
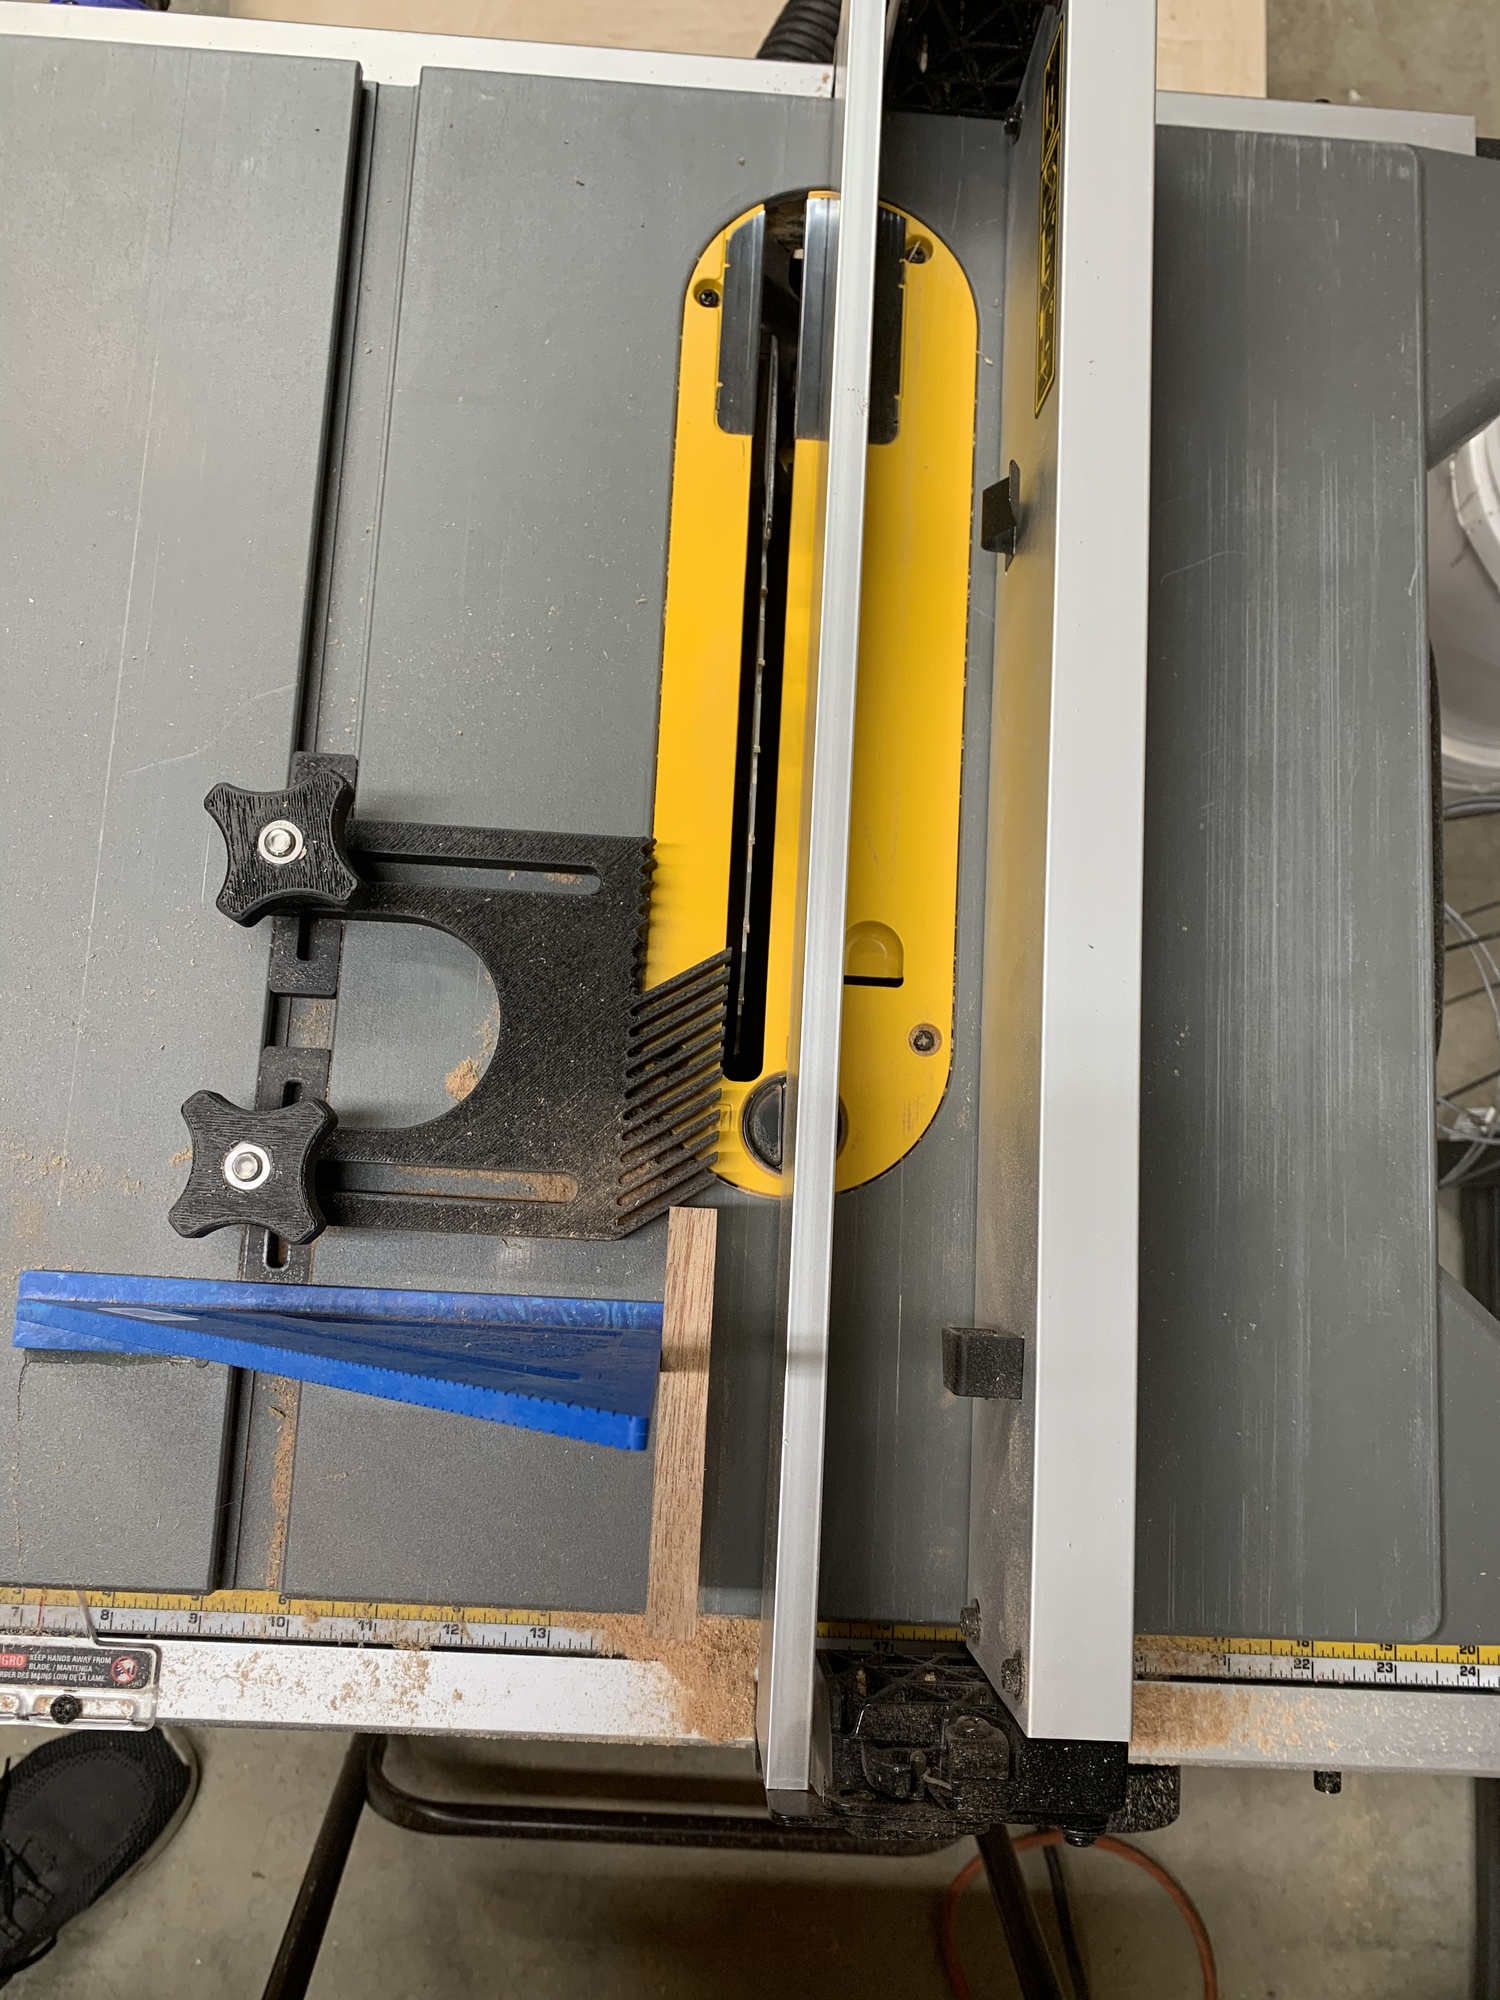
I’ll practice on a few lengths of 2x4 stud before ruining nice wood. YouTube has quite a few recommendations for re-sawing on a table saw, the important part is keeping the bottom corner of the wood pressed up against the fence—this can be achieved with a featherboard (I 3D printed mine).
I originally attempted to do this with only a featherboard, and was taking fairly aggressive cuts - maybe 3/4”. The table saw bogs down quite a bit at that depth, and the blade starts to chatter. Advice: take shallow cuts, a 1/4” at the most.
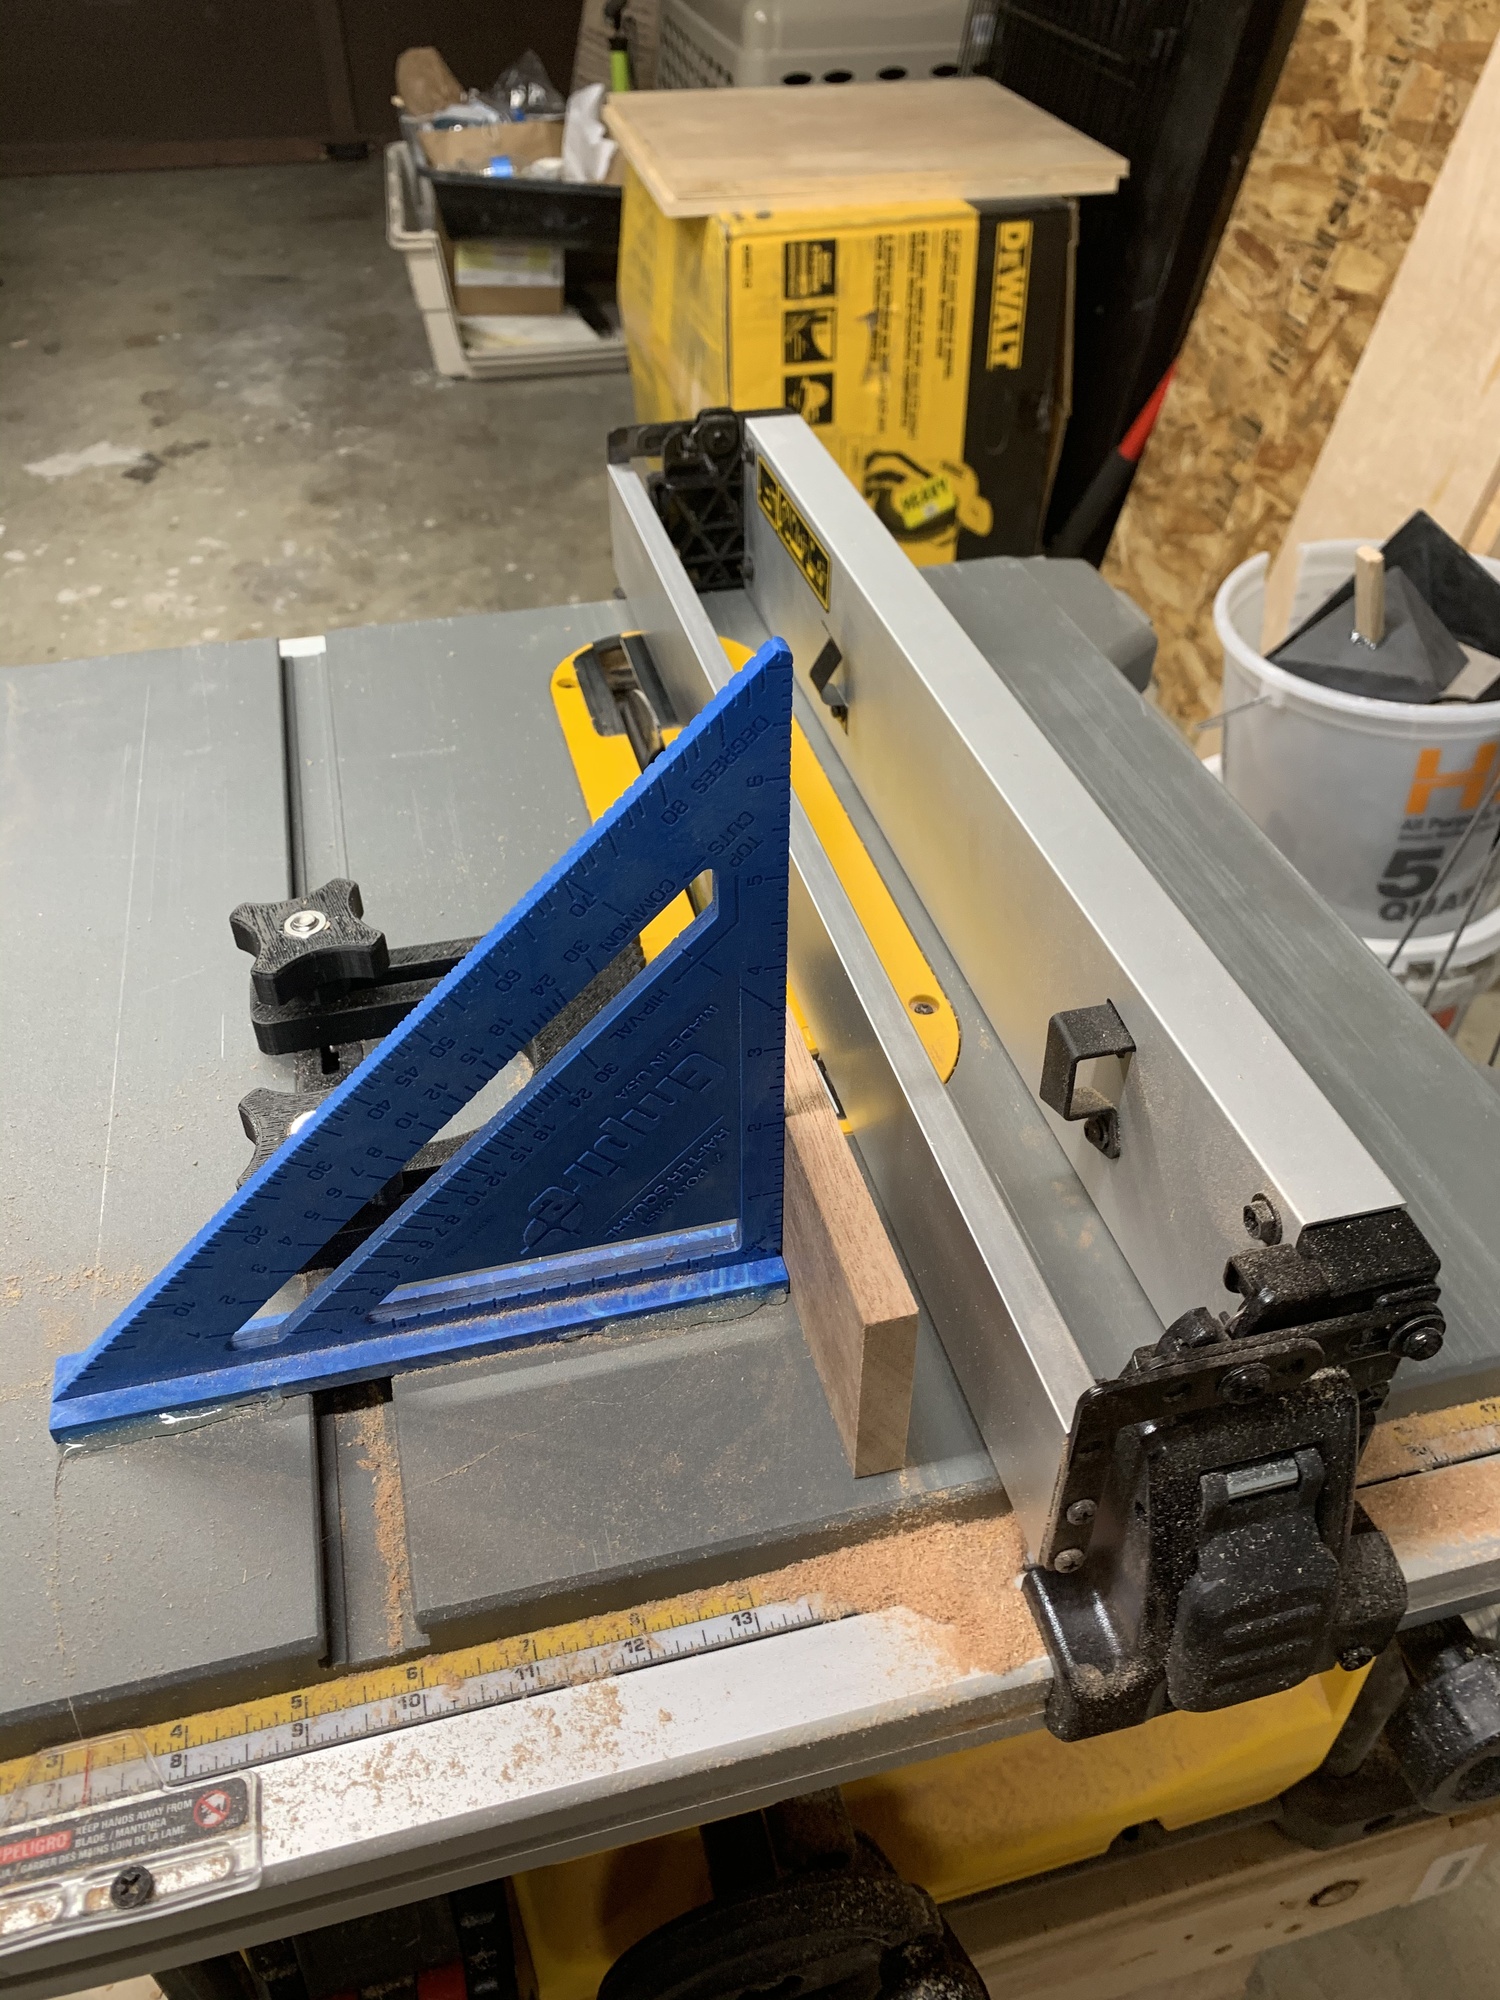
Here’s the jig I used for keeping everything square and flush with the table saw fence. I used a featherboard to keep the bottom face flush against the fence, and a speed square tacked to the table with hot-glue to keep the top square. This setup applies only light pressure, to prevent bowing on longer boards.
 |
 |
The 2x4 tests went pretty well, and I think it’s time to start risking some semi-nice wood.

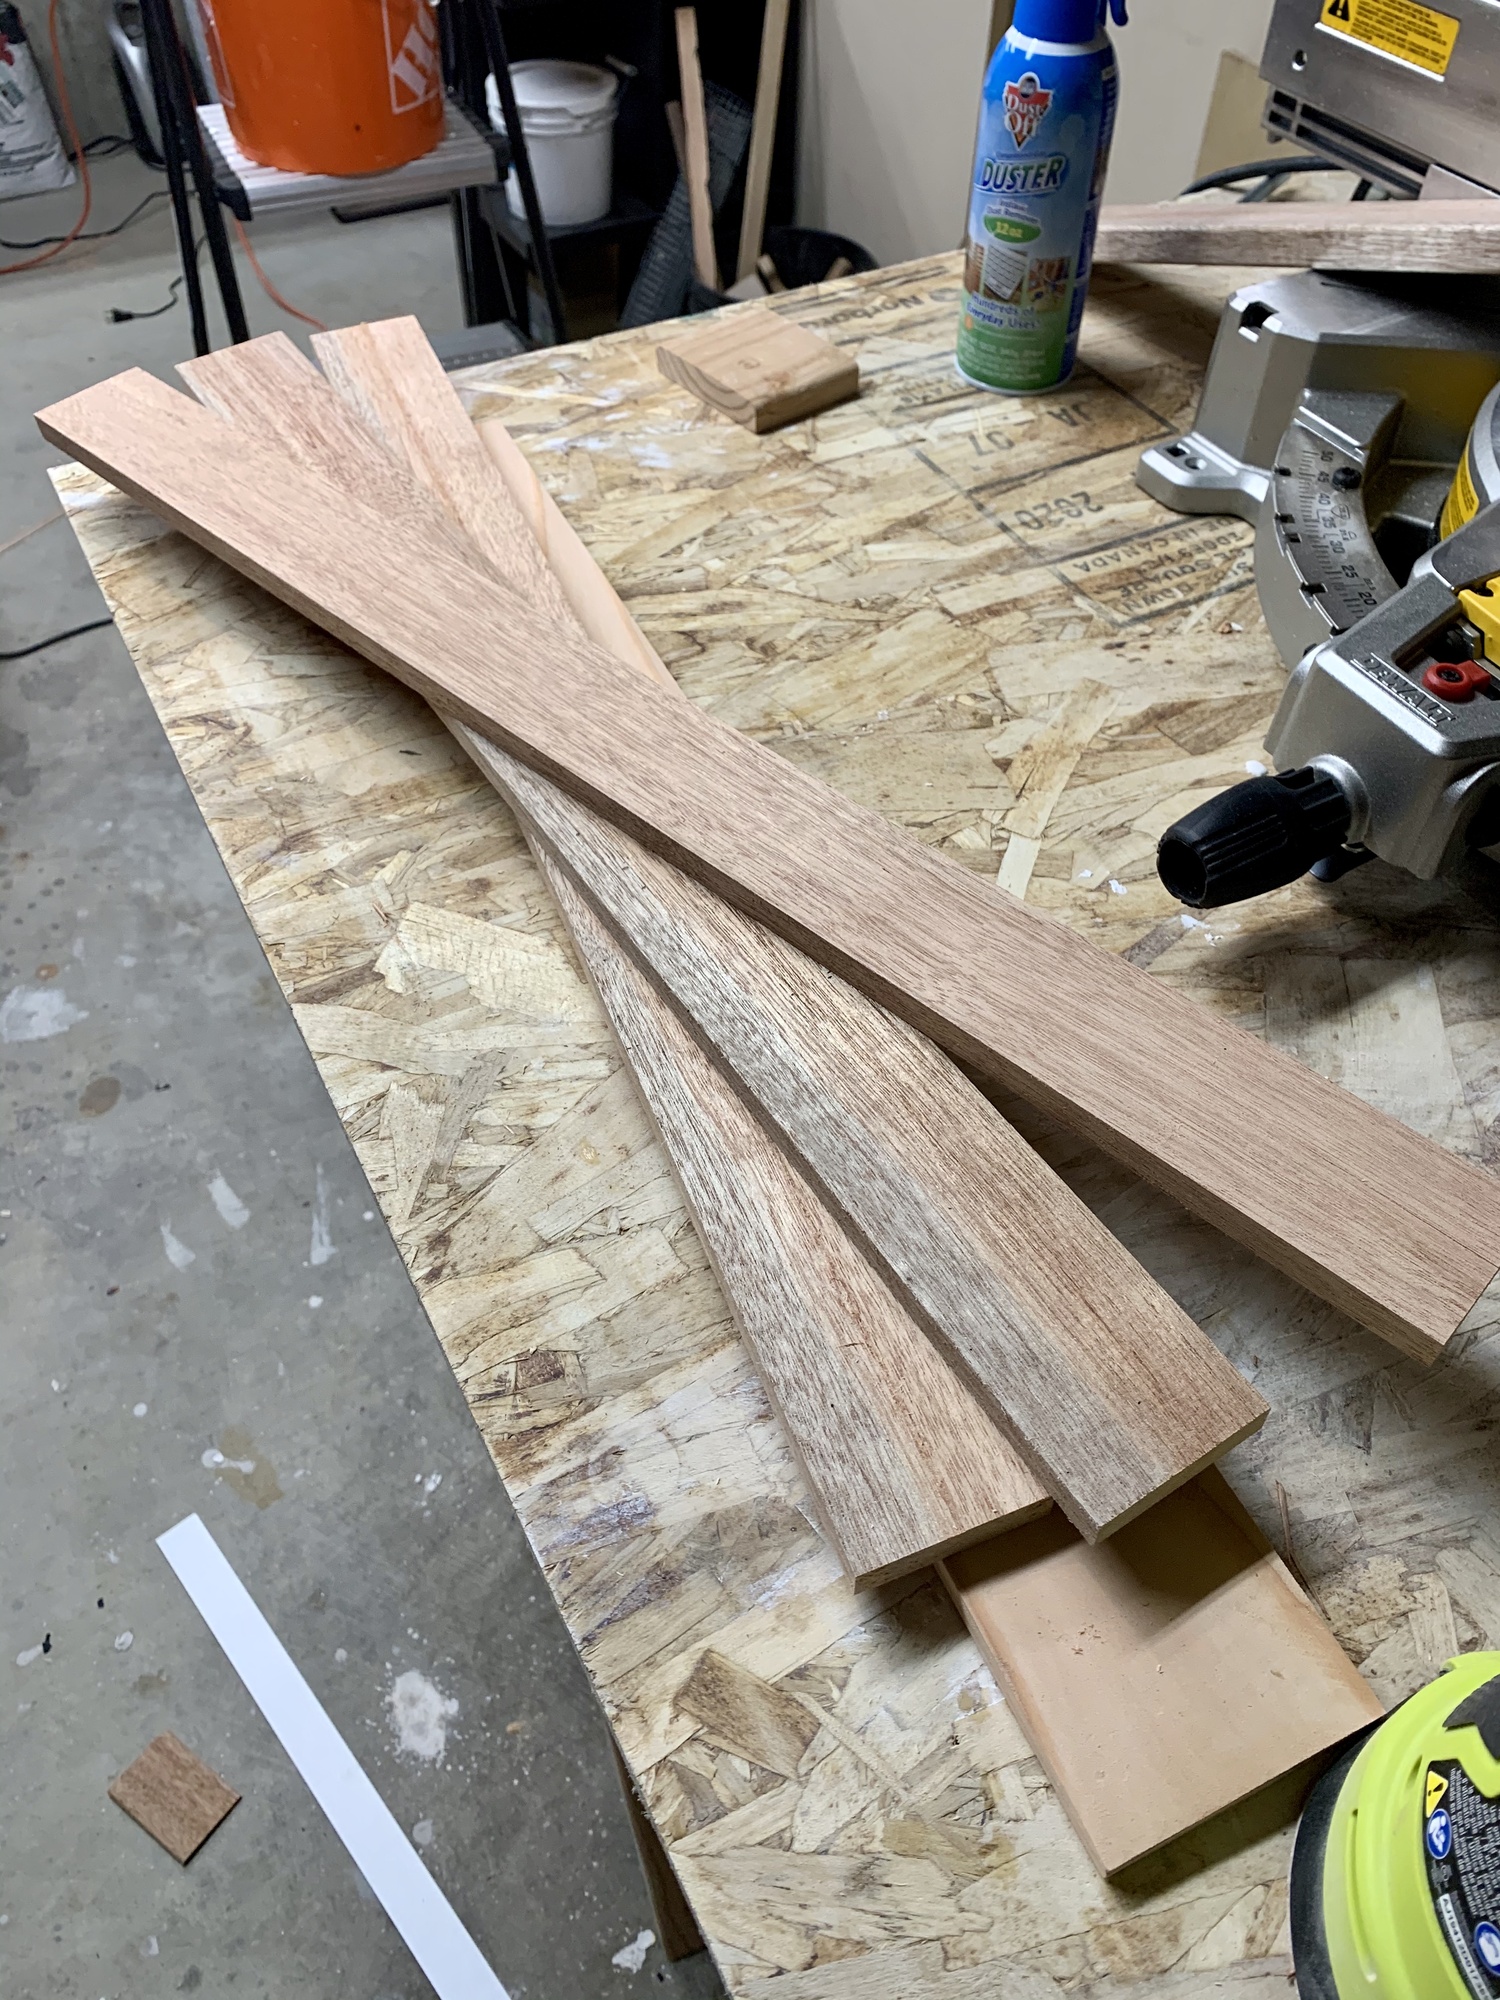
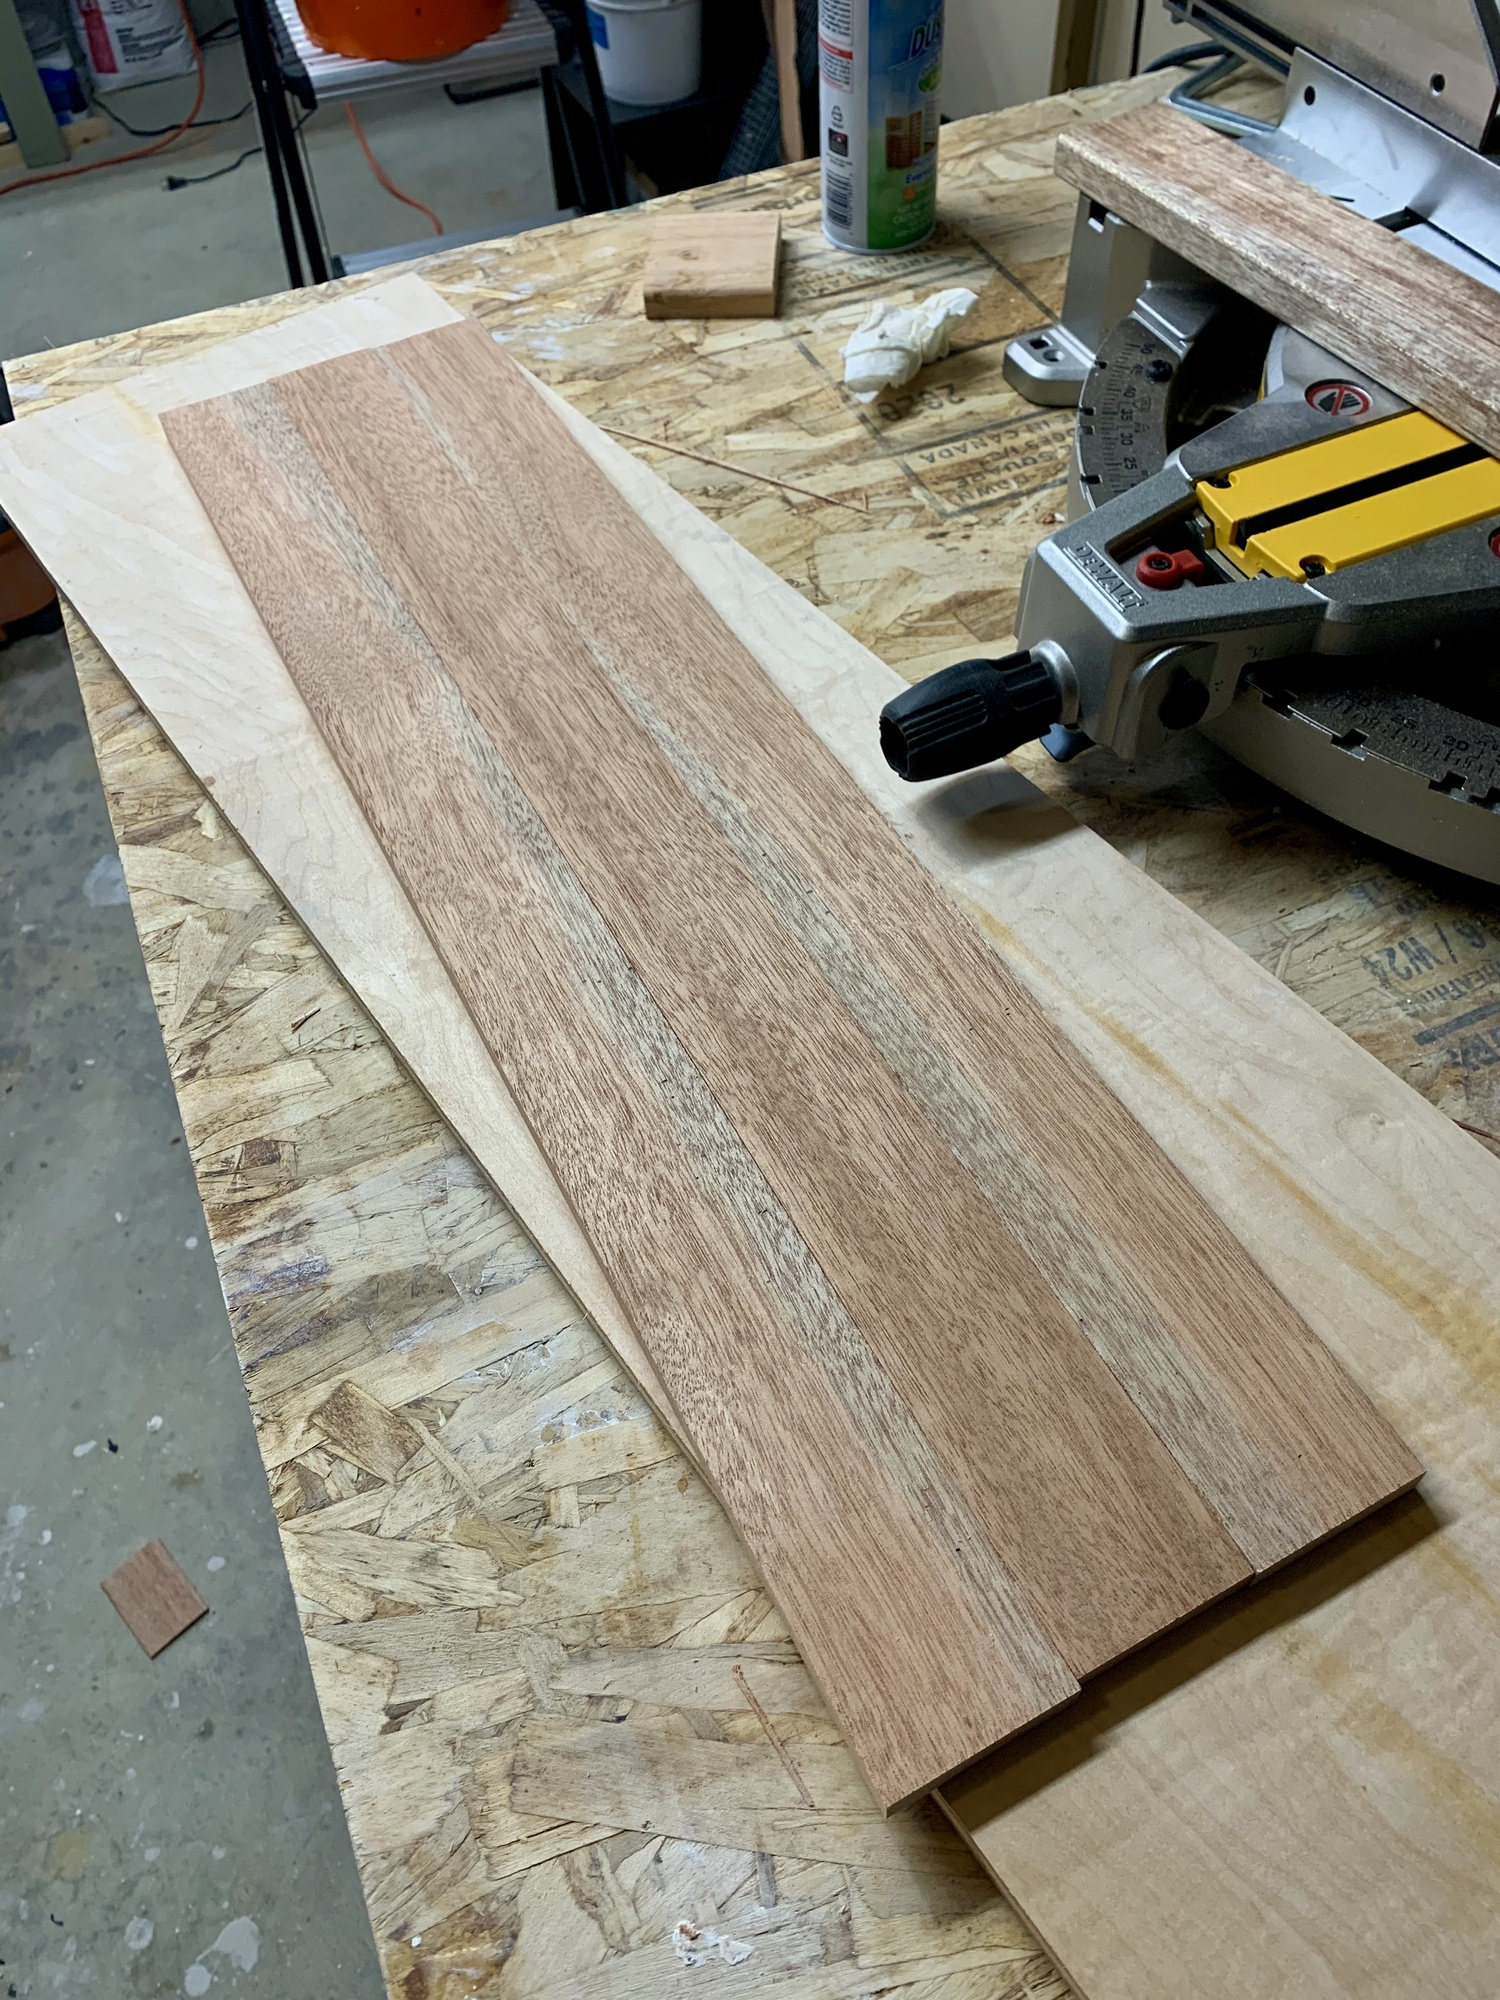
I cut a board into 3 28” planks, a bit over what’s needed, so I’ve got plenty of room to make mistakes (intact fingers crossed). The plank is a hair over 2.25” wide and 0.5” thick, so after losing an eight of a inch off each side from removing the rounded edges, I’ll have a slab that measures 28” x 6.75” x 0.5”.
After a bit of sanding, the underlying colors start to come through from beneath the rough resawed surface. I’ll lay them out in a pattern I think looks nice, as there’s a cool looking dark vein running through the sides of two of the pieces.
 |
 |
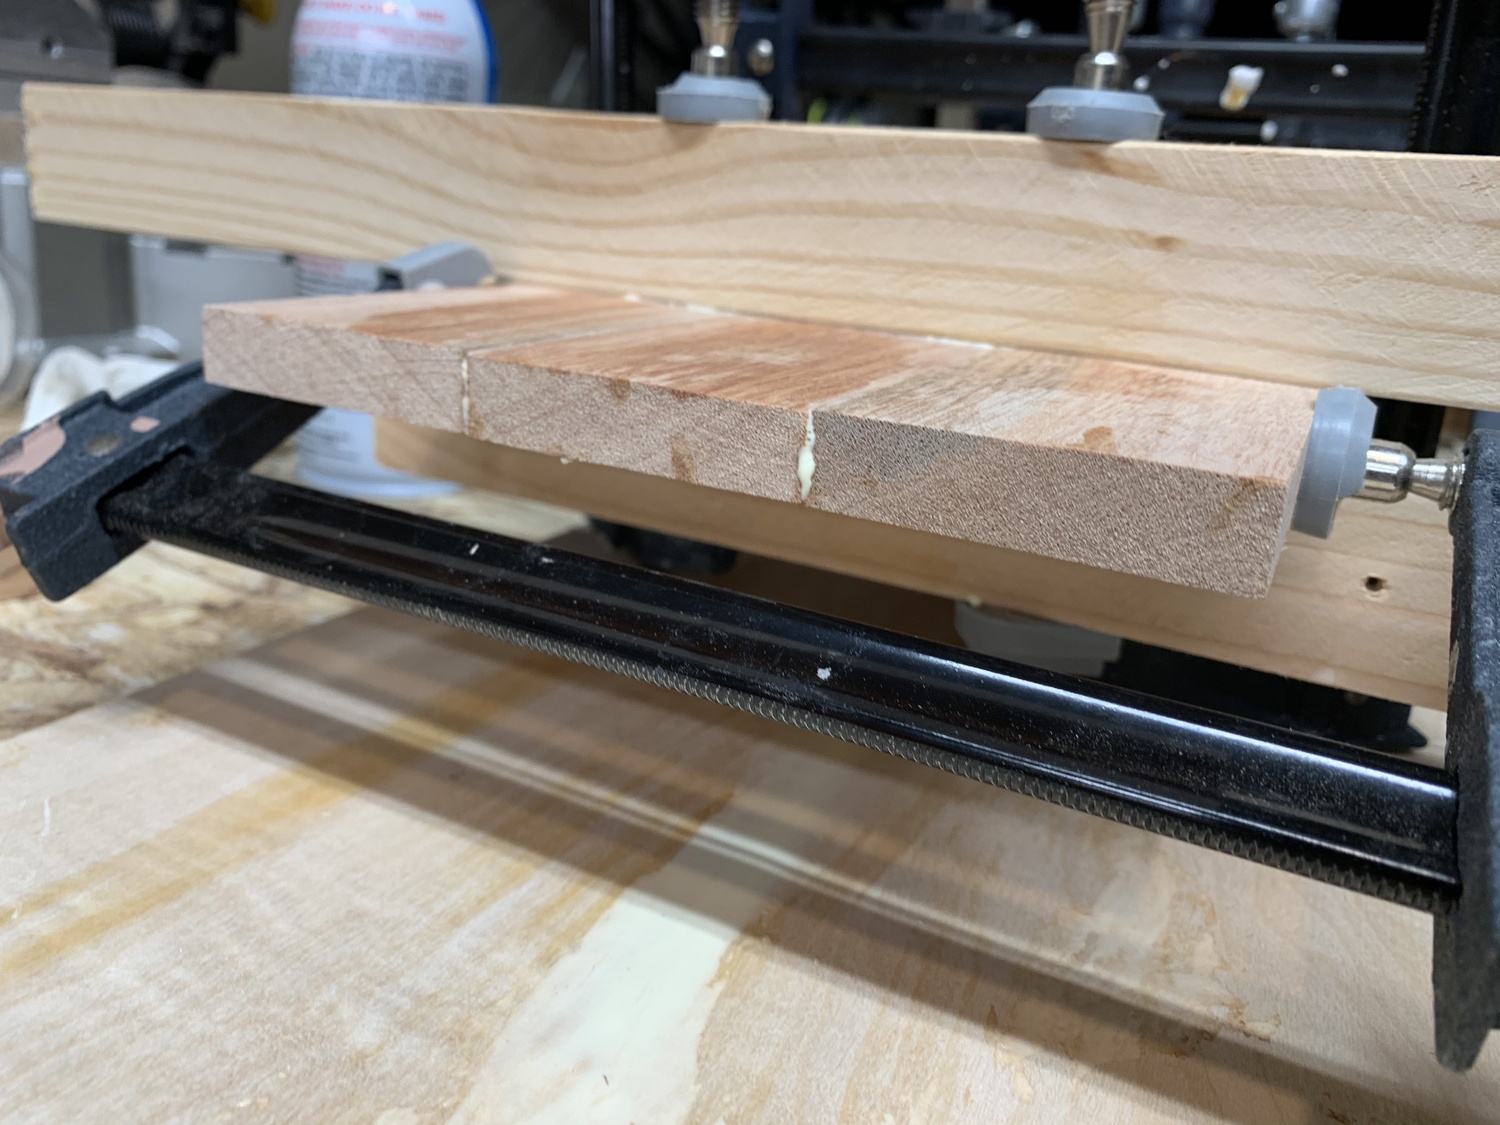
I cut pieces of wood (cottle boards) to sandwich the planks between. Without them, the clamping pressure would bow the boards, and the largest faces of the planks wouldn’t be coplanar. There’s also a slight cup in the planks, so this will remove some of that while keeping the edges aligned—the middle plank is flipped so it’s cupped in the opposite direction as the two outer planks.
There’s a lot of glue about to be involved, so I apply packing tape to the surfaces of the cottles, which the glue won’t stick to.
Everything is laid out and clamps are readied before any glue is applied.
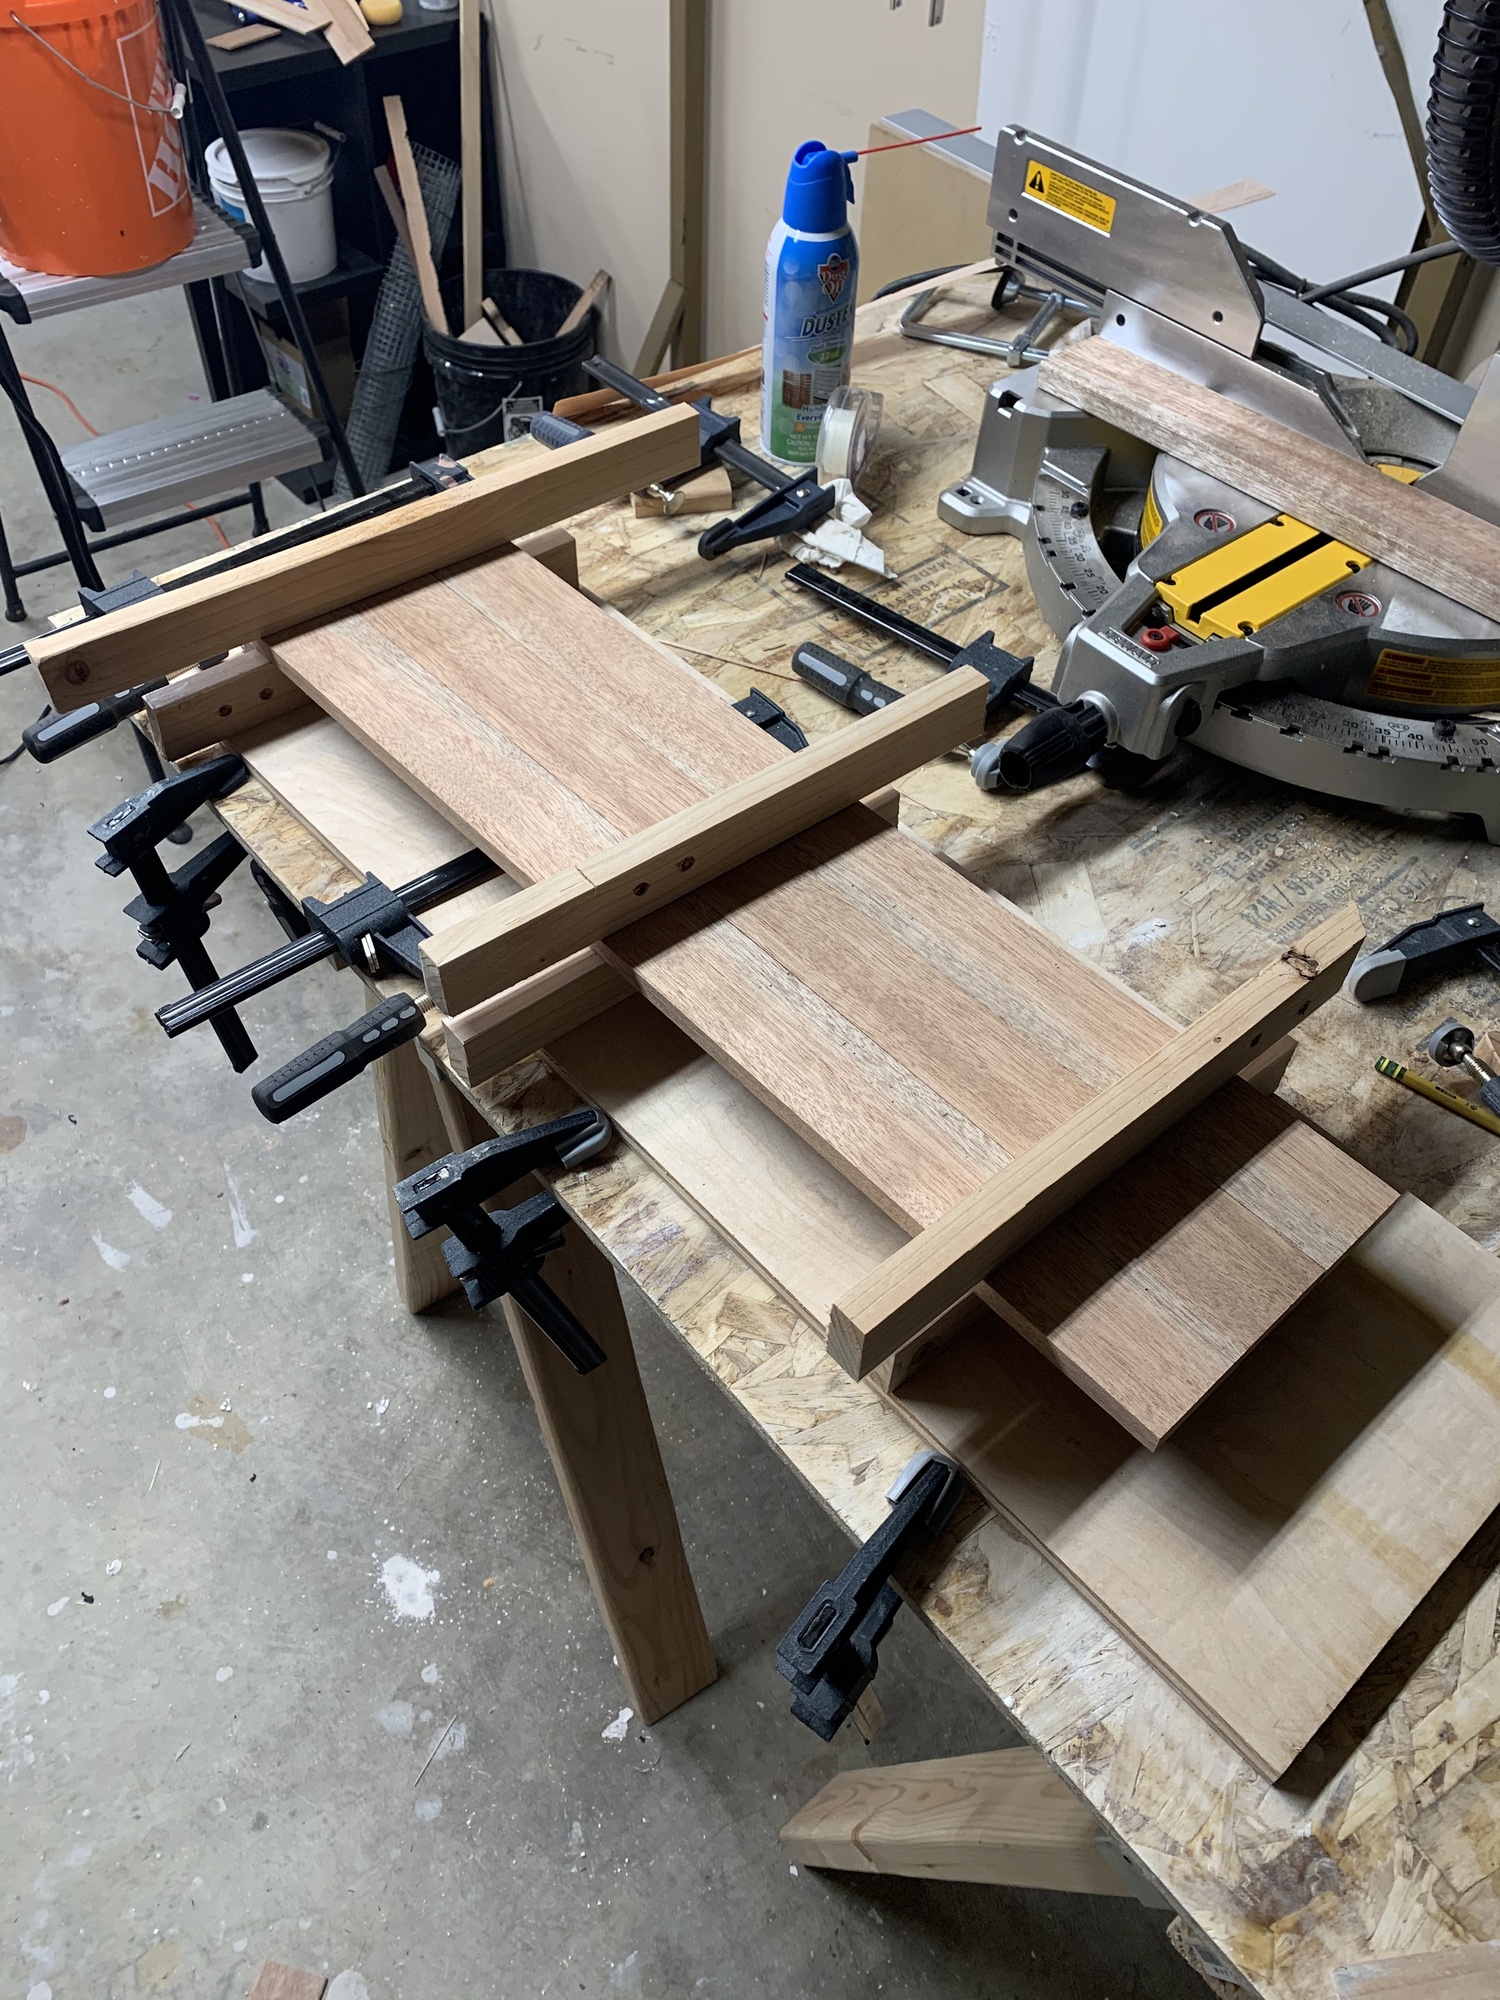
Once glue is applied, three clamps apply pressure from the edges to press the planks into a panel.
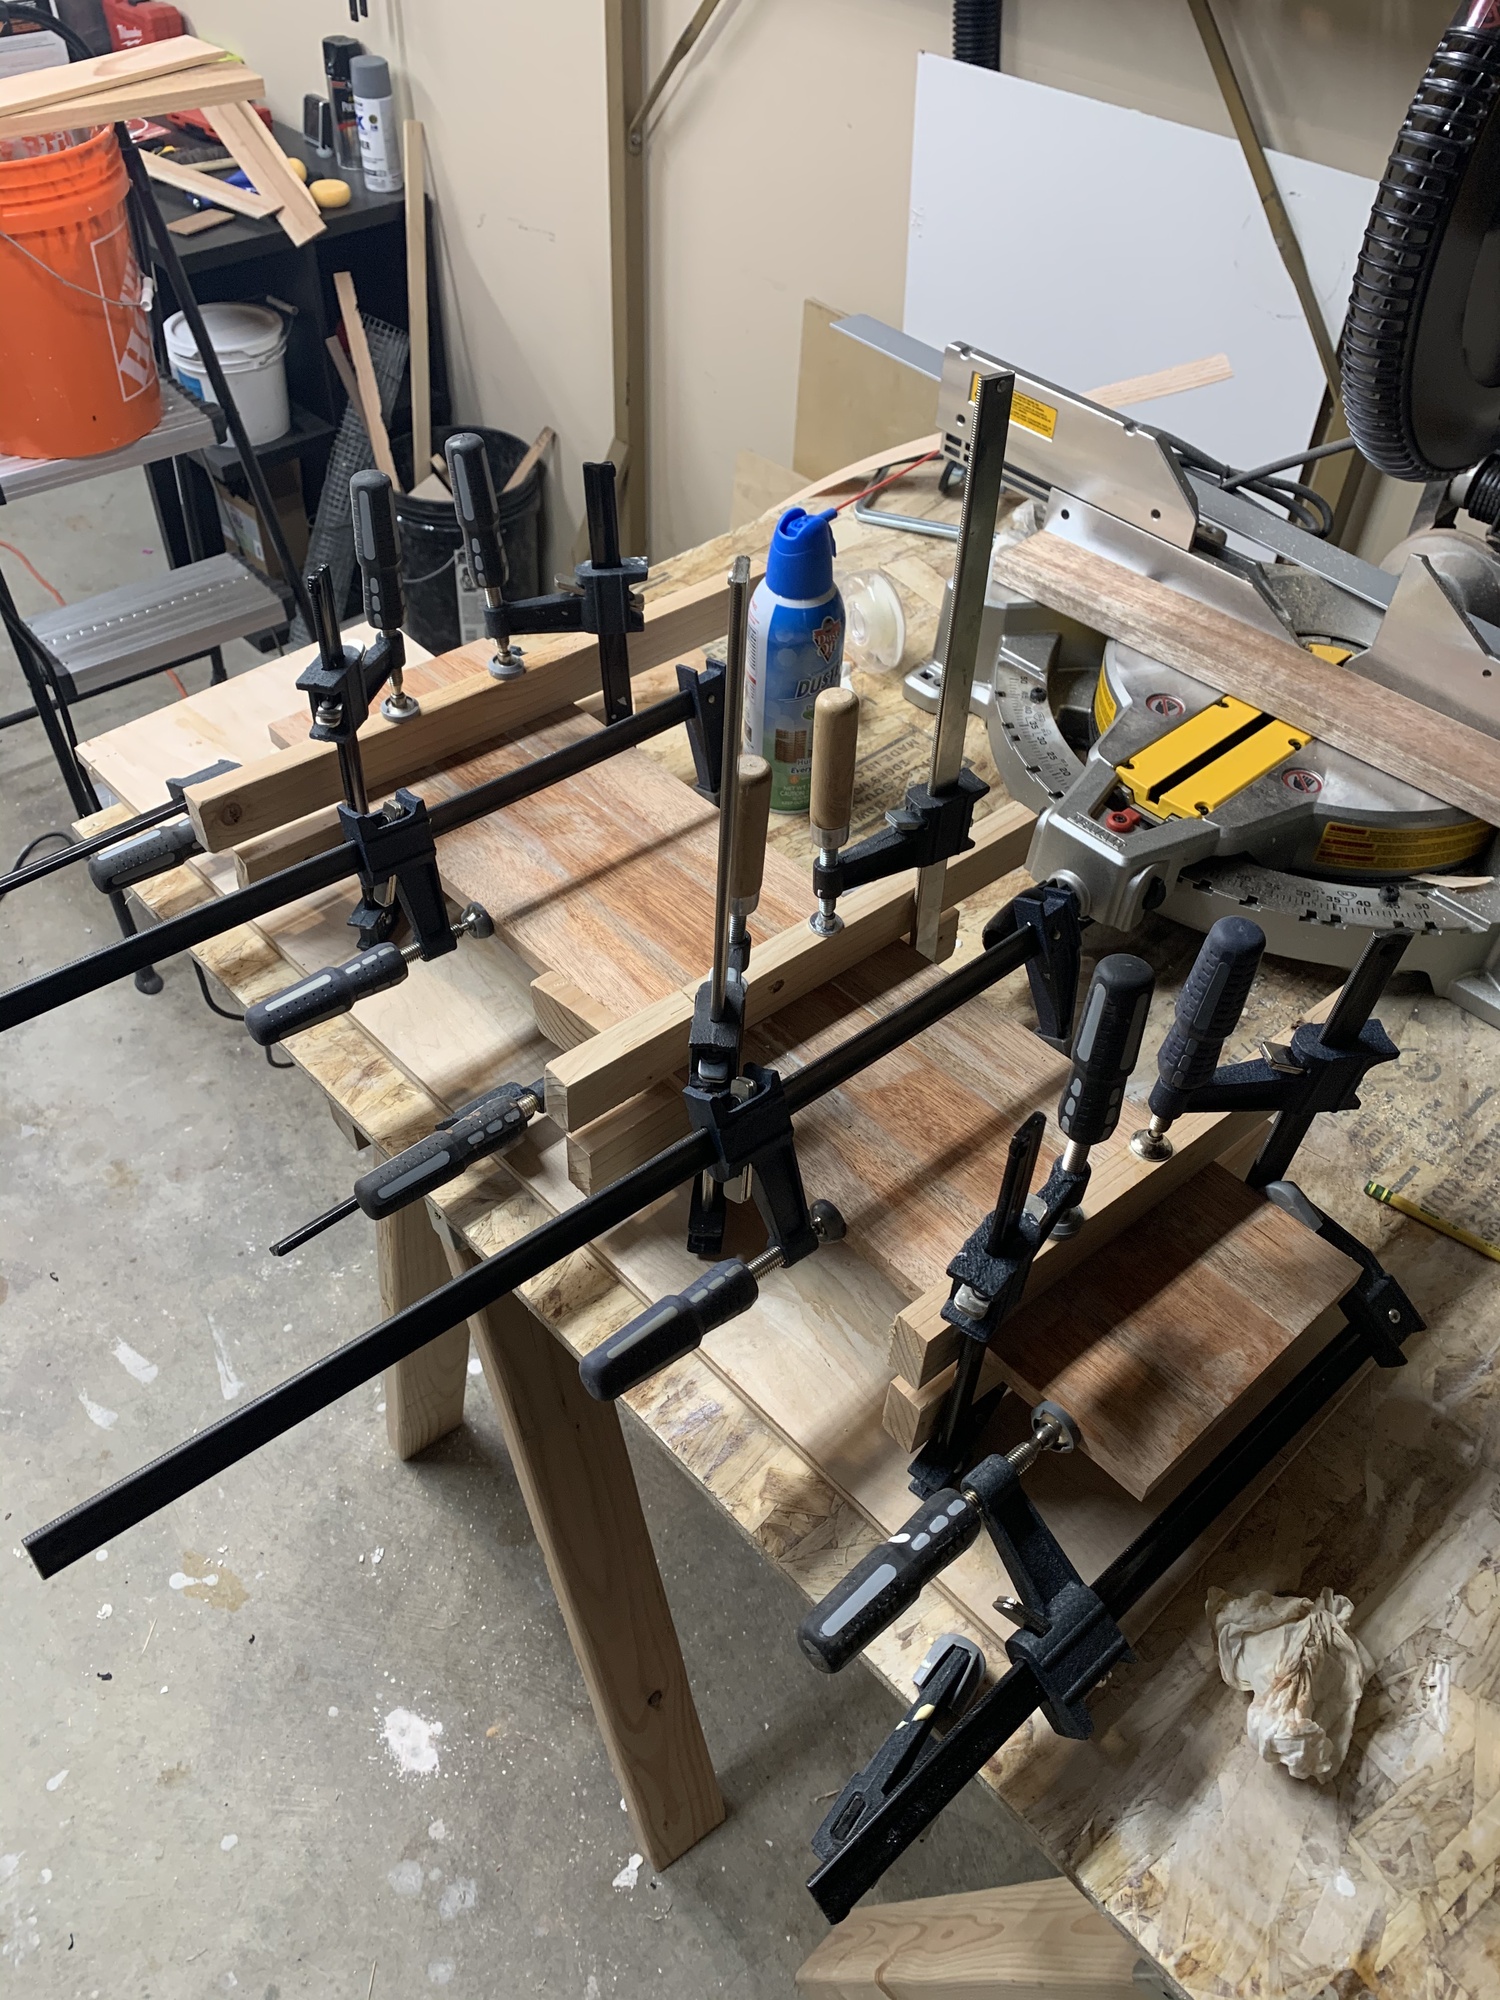
The cottles do a good job of keeping everything stable, and now it’s just a matter of waiting overnight for the glue to cure.
Head on over to part 2, where I’ll be cutting the panel up to make the stand!